Unsupported browser
This site was designed for modern browsers and tested with Internet Explorer version 10 and later.
It may not look or work correctly on your browser.
- Presentations

30 PowerPoint Presentation Tips to Make Good PPT Slides in 2024 (+ 6 Expert Tips)
- Bahasa Indonesia
Here are 30 quick PowerPoint presentation tips to help you improve your presentations.

Plus, get PowerPoint tips on changing your slide design to make your content shine. We've even called on six presentation experts for their best tips.
How to Make a Good PowerPoint Presentation (Watch & Learn)
This screencast is a speed round of my very favorite PowerPoint tricks. It's a great resource to learn how to make a presentable PowerPoint. I'll walk you through ten of my favorite PowerPoint tips and tricks to create a better presentation.

Keep reading for an illustrated version of these good PPT tips (and more) that you can use to improve your PowerPoint presentations. You'll see 30 of our favorite PowerPoint presentation tips and tricks, including techniques to update slide master PowerPoint 2024 designs.
Jump to content in this section:
- How Do You Give a Memorable PPT Presentation?
- Practice Makes Perfect
- Adapt Your Presentation to the Audience
- Use a Custom Font
- Use Contrast
- Avoid Too Many Animations
- Use the Rule of Three
- Use a Custom PPT Theme Design
- Make Use of Charts and Graphs
- Use the Built-in Slide Layouts
- Align Text Consistently
- Make Your Exports User-Friendly
- Try a Different Color Scheme
- Edit Slide Masters for Consistency
- Use the Alignment Feature
- Use Stock Assets
- Reduce Your Content
- Rethink Your Slide Order
- Use PowerPoint Animations
- Invite Collaborators
- Add Supporting Video Clips
- Use Infographic Templates
- Use Impactful Closing Techniques
- Include Data in the Appendix
- Alternate Between Solid Color and White Slides
- Present Information With Maps
- Keep the Design Best Practices in Mind
- Set a Time Limit
- Test Your Content Everywhere
30 Tips: How to Make Good PowerPoint Presentation Designs Fast in 2024
A few tried and true tips can help you speed up your PowerPoint presentation design. Check out 30 of my favorite PowerPoint tips to do just that. Each of these give you PowerPoint slideshow help to create good PowerPoint slides:
1. How Do You Give a Memorable PPT Presentation?
If you're learning the top PowerPoint presentation tips and tricks, you're probably asking yourself: how do I give a presentation that won't be forgotten?
We all want to be remembered. The best PowerPoint slideshow help to make a mark on the audience. There are tried-and-true ways to do just that, and expert Neil Tomlinson shares expertise on being remembered:
Get your main point into the presentation as early as possible (this avoids any risk of audience fatigue or attention span waning), then substantiate your point with facts, figures etc and then reiterate your point at the end in a ‘Summary’.
2. Practice Makes Perfect
Also, don’t forget to practice your presentation. Go through your slide deck a few times to make sure you know it like the back of your hand when the big day arrives. Doing so helps you feel more confident. It'll reduce any anxiety and nervousness you might feel as the presentation day approaches.
What's the best way to rehears for a good PowerPoint? Here's one of the top PowerPoint presentation tips from expert presenter Sandra Zimmer :
Once slides are ready, practice one slide at a time aloud until you feel like you know it and like the flow of speech. Be willing to change anything that does not feel in flow. At the end of learning all your slides, practice the whole talk.
If you want even more great PowerPoint presentation tips and tricks, check out the following post:

3. Adapt Your Presentation to the Audience
Let's say that you're a seasoned presenter with a pretty standard set of presentation topics. Maybe you're an expert in your field, and you're asked to give a PPT presentation frequently on similar topics.
That's the value of being an expert. You might have a standard spiel that you give your audiences, and your content won't totally change from one presentation to another. That's why it helps to make only slight tweaks to adapt your presentation to each audience.
Leading presentation expert Suzannah Baum offered up this advice:
Different audiences will have different needs and different challenges, which requires me to re-sequence the slides, or create new ones. I tend to do a lot of research on my audiences – via surveys, interviews, and conversations with the hiring manager – to help me better understand what information would be most relevant to them.
How do you adapt to your audience? Here are a few more tips:
- Learn about them. If you're asked to speak, talk to the curator of the presentation to learn more about the audience and their background.
- Ask about them! With contact details, send out a survey or a response link to ask for feedback and preparation info. Ask leading questions like "what do you want to learn?"
- Consider the environment. If you're presenting via Zoom, your style will differ from presenting in person. The key is to acknowledge the difference and adapt to your environment.

Learn everything you can about your audience. Learning how to make a presentable PowerPoint is all about thinking of the recipient, not the presenter!
4. Use a Custom Font
A PowerPoint presentation tip that'll make your slideshow more interesting and more engaging is to use a custom font.
Fonts set the tone for your presentation. So, when you use a premium font, you’re opting for a high-quality font while also adding a personal or creative touch.
When choosing a font, remember that you want everyone to read your text easily.
5. Use Contrast

One PowerPoint trick is to use contrast to make some of your text stand out or make it easier to read.
If you’re putting text over an image on our PowerPoint slide, you may need to use a white box with black text in it to make your text easier to read. You can also use contrasting colors to highlight important text.
6. Avoid Too Many Animations
Another PowerPoint tip is to avoid having too many animations or transitions.
When you've got too many animations, it can be distracting to the audience. It’s not only distracting, but it's unprofessional.
It’s best to stick to one or two animations throughout your presentation. Also, if you've got any animations in your presentation, make sure to test them to see if they work before presenting.

7. Add Audio
Include audio on a slide on PowerPoint to increase audience engagement. Audio can be anything from fun sound effects to interview clips. You can even add an audio clip of your voice.
Audio gives you a break from speaking while also engaging the audience. Envato Elements has hundreds of premium audio clips if you want to add some.

8. Use the Rule of Three
One PowerPoint tip and trick is to follow the rules of PowerPoint.
One of those rules is the rule of three. It's where you start by dividing your presentation into thirds. Everything should come in thirds, so if you use bullet points, you should only have three. If you use icons, you should only have three.
When things come in threes, it's easier to remember them. For more information, read this informative article:

9. Use a Custom PPT Theme Design
Above all, consistently use custom PowerPoint themes. Microsoft has built-in themes that you can use for free, sure. But the premium themes that are on Envato Elements are a major step-up from PowerPoint's built-in themes.

When you subscribe to Envato Elements, you'll have access to unlimited downloads of all the PowerPoint themes. Right now, Envato Elements has almost 4,000 PowerPoint themes and that number is always growing. You'll learn tips for a good PowerPoint presentation by using the best templates.

10. Make Use of Charts and Graphs
Illustrate your data with the use of charts and graphs. Not only will you be able to make your presentation more visually appealing, but you'll also help your audience remember the information better.

Many PowerPoint templates already include chart and graph elements. Easily customize them to make your data and stats more interesting and easier to understand.
Want to learn more about how to use data? Turn to expert Adrienne J ohnston , a presentation professional:
When it comes to visualizing data in presentations, we have to remember that our audience does not need all the fine details of the data - they need the main takeaway and we need to make sure that's evident to them when looking at the slide.
11. Use the Built-in Slide Layouts
Inside of PowerPoint themes, you'll find layouts , which are custom slide designs.
Most themes include a selection of content layouts that you can use as a starting point for your own slide designs. You can leverage slide master PowerPoint 2024 designs with the help of layouts.

Layouts are like a starting point for your PowerPoint presentation slides. They contain combinations of placeholders for text boxes, images, and more.
Instead of clicking and drawing individual objects onto the slide, use one of these layouts to start your slide off. It's one of the top PowerPoint presentation tips and tricks to save time.
12. Align Text Consistently
When you're working with text on your slide, it helps to ensure that it aligns consistently. Keeping your text aligned in the same orientation really makes a slide look clean.
In the example below, I've basically got three text boxes:
- list of bulleted points
Notice that all this text is aligned left.

Aligning text was the " aha " moment that I learned when I started studying slide design. It's one of those steps that makes a slide look much neater and professional, so keep it in mind when designing.
13. Make Your Exports User-Friendly
No matter how great your PowerPoint presentation slides look, you need to think about how your user will use the presentation file.
Any of these are likely scenarios if you're regularly sending presentations to other users:
- The viewer may not have PowerPoint installed on their computer.
- The recipient may be using a version of PowerPoint that renders the presentation differently.
- Maybe you don't want the user to be able to make any edits or see your notes in the presentation file.

In this case, my favorite tip is to export the presentation as a PDF. To do that, go to File > Export > Create PDF , and then save your presentation as a PDF.
This is sure to help most of your users see the presentation just the way you intended.
14. Try a Different Color Scheme
Many PowerPoint themes have more than one color scheme that you can apply to your presentation. On the Design tab, click on the drop-down next to Themes to try out a different color scheme.

Typically, these will restyle your entire presentation. Premium themes that you might get from Envato Elements, for example, may have many versions inside the original presentation zip file.
15. Edit Slide Masters for Consistency
The slide master controls the design for your PowerPoint slide. Instead of making the same change to each slide, apply a change to a slide master. It'll affect all the PowerPoint presentation slides that use the same master.

It's ideal to apply a logo to the slide master itself, for example. This keeps the logo the same size and in the same position on each slide.
To do that, go to View > Slide Master. On the right side, you're likely to see a variety of slide masters that control designs for many slides. Drop the elements that you want to remain consistent onto one of the slide masters.
16. Use the Alignment Feature
PowerPoint presentation slides look better when the objects on them are in line with one another. There's a certain visual rhythm that occurs when objects line up in the center or along certain boundary lines.

When you start dragging objects on your slide, you'll see guiding lines that pop up. These are very intuitive, and you'll likely notice that they help you line up your objects. You might seem them pop up when you've got a box that's equidistant between two other objects on the slide, for example.
This is one of the best tricks for improving the look of your PowerPoint slide. Spend some time making sure that your key elements line up cohesively.
17. Use Stock Assets
Earlier, I mentioned using Envato Elements to grab PowerPoint themes. But there's more that comes with an Envato Elements subscription for presentations.
That includes a wide variety of stock photos, graphics, and custom designed fonts that you can use in your presentation. Instead of reusing the same stock photo or clip art, Envato Elements has everything you need to supplement a presentation.
Again, Envato Elements is the perfect subscription if you build presentations. It's a one-stop-shop that you can use to fill content.
18. Reduce Your Content
There's nothing that makes an audience tune out faster than being overloaded with slide content. Sometimes we try to make so many points that the audience misses all of them due to information overload.
Less is truly more. When you cut the weaker points of your presentation, the audience's attention will follow your key points accordingly.
It seems like cheating, but one of the best steps that you can take for your slide is to simply reduce the number of items that are on it. Convert some of your typed points to things you'll speak verbally.
19. Rethink Your Slide Order
Sometimes, I find that my presentations are out of order. I might spend too much time explaining my decision before I get to the conclusion.
In these cases, I like to use Slide Sorter View to re-sequence the slides in my presentation. To access this view, go to View > Slide Sorter on PowerPoint's ribbon.

From Slide Sorter view, you've got a top-down view of all the slides in your presentation deck. It sometimes becomes obvious that the slides can be reordered into a better sequence from this view.
20. Use PowerPoint Animations
One of my favorite PowerPoint presentation tips is to complement your major points with a bit of animation. Using animation can bring a key point onto your slide with style!
Check out ten of the best PowerPoint tips for how to use animation from expert Sven Lenaerts below:
21. Invite Collaborators
Building a presentation often benefits from a second set of eyes. That's why it helps so much to invite a collaborator to work with you side-by-side in Microsoft PowerPoint.
Pushing your presentation up to OneDrive and inviting collaborators is easy. Thanks to the cloud-based approach, more than one user can edit a slide deck in real time. Learn how to do that in the tutorial below:

22. Add Supporting Video Clips
Building impactful presentations is all about adding other perspectives and angles to the content. One of my favorite ways to do that is to add a video clip. Maybe that's a production that you built on your own or found on sites like YouTube.
Either way, learn how to add and auto play a video clip in the quick tip below:
23. Use Infographic Templates
More presentations than ever will feature visuals that tell stories with data. But it's easy for an audience become overwhelmed with data.
That's where infographics come into play. Learn to use them in PowerPoint in the tutorial below:
24. Use Impactful Closing Techniques
I've sat through many presentations in my life. I can only remember a few that really stick out, thanks to techniques that highlighted key points. You need PowerPoint tips and tricks that help leave your audience with an impact.
To do just that, make sure you use some of the techniques highlighted in the article below:

To do that, just drag and drop the thumbnails into the order you want. When you return to Normal view, the PowerPoint presentation slides will be in the resequenced order you set here.
25. Include Data in the Appendix
Many PowerPoint presentations include data in the form of charts and graphs. That means that you'll condense specifics into a few easy-to-follow charts.
But what if your audience wants more of the backing details? Maybe they want to validate and review the detail for themselves. In that case, a set of appendix slides with extra data is sure to help.

Appendix slides are included at the end of a presentation deck for backup purposes. You might not present them, but your audience is certain to appreciate that you included them. That helps your presentation continue to be useful even after you leave the room.
Here's a great tip from: pro presenter Graeme Thomas of Johnny F Designs:
If (my clients) are sending the deck straight to clients however, I would then put all the information on the slides but will often use more slides so that they aren't too cluttered. In cases where there is a lot of content, like financial statements, I would use appendix slides.
Including an appendix helps your audience understand data without overwhelming them with that data. Follow these tips so that you get the best of both worlds.
26. Alternate Between Solid Color and White Slides
Alternating between solid color and slides with a white background can produce an interesting visual effect and engage your audience. You can use the solid-colored slides to signify a new section in your presentation.

Not to mention, solid-colored slides are the perfect way to re-enforce your brand colors and build your brand recognition.
27. Present Information With Maps
If you’re trying to make a case for a global expansion or need to report on how other branches are performing, consider using a map to help your audience visualize the data.
There's no shortage of quality PowerPoint templates with maps built in so be sure to take advantage of them.
28. Keep the Design Best Practices in Mind
The design of your presentation matters just as much as the content of your presentation. That’s why you need to devote an equal amount of time to making sure the design of your presentation is on point as you do to the actual content.
Familiarize yourself with best design practices and keep them in mind as you go about customizing your template.
29. Set a Time Limit
How many slides is the right number for you? Well, it all depends on the time limit you set for your presentation.
Believe it or not, setting a time limit is helpful to create good PowerPoint slides. If you want to learn how to make a presentable PowerPoint, it's a must to lock in the time limit and ensure that your slides support that timeframe.
Expert presenter Stephanie Ottavan offers one of our top tips for a good PowerPoint presentation based on time limits:
A presenter is usually limited to a specific time frame and you want to adhere to that as closely as you can. If you have animations and transitions in your deck, these take added time so make sure to rehearse in “show mode” of PowerPoint or Keynote and time yourself.
Believe it or not, setting a time frame is one of the most important part of creating a PPT presentation. It helps you influence how many good PowerPoint slides you should design.
30. Test Your Content Everywhere
PowerPoint in 2024 could take place anywhere. Maybe you present, online, in-person, or beam it to mobile devices. It's important to remember that the content will appear differently on each device.
PowerPoint Online is a different medium than many other apps. Make sure that your presentation design appears the same by testing it with the help of this tutorial. It shows you how your PPT presentation appears even in a browser:

Discover Great Premium PowerPoint Templates With Google Slides (For 2024)
Creating a great presentation starts with a great template. And a great PowerPoint slide design use the best presentation practices, for example:
- Use high-quality photos and graphics to help tell the story.
- Keep text to a minimum.
- Stick to one idea per slide.
Designing a great template doesn’t mean you've got to start from scratch, though. Take a look at some of the best PowerPoint templates we've got on Envato Elements.
1. Neo PowerPoint Template

The Neo PowerPoint template features a modern and bold design and includes five color variations to get you started. Along with this, you'll also get 10 master slides and 30 individual slides for all your presentation needs.
2. Vexana PowerPoint Template

The Vexana template is a great choice for brands that need a touch of elegance. This template works with PowerPoint and Google Slides and comes with a grand total of 150 slides. It also has five color variations and includes infographic elements and photo placeholders.
3. Sprint PowerPoint Template

The Sprint PowerPoint template features a professional and modern design. The template is easy to customize. You'll find 20 masters in the standard 4:3 size, allowing you to choose the best layout for your information.
4. Travelicious PowerPoint Template

For any presentation that deals with the topic of travel, check out the Travelicious template. This template is compatible with both PowerPoint and Google Slides. It includes three premade color variations as well as 30 unique slides.
As you can see from the examples above, there's no shortage of beautiful and professional PowerPoint slide designs on Envato Elements . What’s more, Envato Elements allows you to download as many PowerPoint templates as you want. Plus, get thousands of other design assets such as fonts, photos, and icons—all for one low monthly price.
Want to see even more great PowerPoint template examples? Be sure to check out our related roundup:
Need Help? Grab Our Making Great Presentations eBook (Free)
We've got the perfect complement to this tutorial. You can find more information in our eBook on making great presentations . Download this PDF eBook now for FREE with your subscription to the Tuts+ Business Newsletter.
It'll help you master the presentation process from initial creative ideas through to writing, design, and delivering with impact.

PowerPoint Frequently Asked Questions (FAQ)
Now that you’ve read about PowerPoint tips and tricks, if you want to learn more about PowerPoint, here are some FAQs:
1. What Is a Placeholder?
Placeholders in your slide on PowerPoint help you easily add text or images to your slide without changing your design.
In a template, sometimes the placeholders have prompts such as “Click to insert a picture” or “Click to add text.” These prompts let you know what kind of placeholder it is. To learn more about placeholders, read this article:

2. How Can I Automatically Play a Video?
A PowerPoint tip is to insert an automatically played video in your presentation. When you've got a video that'll play automatically, it saves you the trouble of starting your video manually.
Videos can illustrate topics or specific points. They're also a great way to keep your audience engaged. If you want to learn how to play a video automatically, read this tutorial:
3. How Can I Add a Map to my Slide?
Another PowerPoint trick is to add a map to your slide. If you're discussing a specific location, then a map can help your audience visualize the location you're presenting. To learn how to add a map to your PowerPoint slide, read this tutorial:
4. How Do I Add a GIF to My Presentation?
Adding a GIF to your slide on PowerPoint is one way you can grab your audience's attention. To add a GIF to your slide, you’ll need to download a GIF.
Once you download it, upload it into PowerPoint and use it on your slide. For more information about how to add a GIF to your slide on PowerPoint, read this article:

5. Can I Recover My Unsaved Presentation?
Another PowerPoint trick is to learn how to recover unsaved PowerPoint files so that you can be prepared in case of an emergency. If you want to learn more, read this tutorial:
Learn More About How to Make Presentable PowerPoints
These quick PowerPoint Presentation tips are some of my favorite ways to rapidly improve a presentation. Keeping them in mind while you build a presentation can help you build a deck that you'll be confident about presenting.
Check out these tutorials to keep learning more about PowerPoint. These tutorials will give you more ideas for fixing up your PowerPoint presentation slides efficiently:

Find More Templates
Didn't see a template you like? Here are some more:

Use These PPT Presentation Tips on Your Next Presentation
Now that you've studied some of our best PowerPoint tips, it's time to put them to use. Download one of our top-notch PowerPoint themes from Envato Elements to get started. These PowerPoint presentation tips and tricks give you confidence to make you a skilled presenter.
Editorial Note : This post was first published in February of 2019. Our staff updates this post regularly — adding new, exciting PowerPoint tips and templates (with special help from Brenda Barron , Andrew Childress and Sarah Joy ).

Home Blog Presentation Ideas How to Start a Presentation: 5 Strong Opening Slides and 12 Tricks To Test
How to Start a Presentation: 5 Strong Opening Slides and 12 Tricks To Test

Knowing how to start a presentation is crucial: if you fail to capture the audience’s attention right off the bat, your entire presentation will flop. Few listeners will stick with you to the end and retain what you have told.
That is mildly unpleasant when you are doing an in-house presentation in front of your colleagues. But it can become utterly embarrassing when you present in front of larger audiences (e.g., at a conference) or worse – delivering a sales presentation to prospective customers.
Here is how most of us begin a presentation: give an awkward greeting, thank everyone for coming, clear our throats, tap the mic, and humbly start to mumble about our subject. The problem with such an opening performance? It effectively kills and buries even the best messages.
Table of Contents
- The Classic Trick: Open a Presentation with an Introduction
- Open a Presentation with a Hook
- Begin with a Captivating Visual
- Ask a “What if…” Question
- Use the Word “Imagine”
- Leverage The Curiosity Gap
- The Power of Silence
- Facts as Weapons of Communication
- Fact vs. Myths
- The Power of Music
- Physical Activity
- Acknowledging a Person
How to Start a PowerPoint Presentation The Right Way
Let’s say you have all of your presentation slides polished up (in case you don’t, check our quick & effective PowerPoint presentation design tips first). Your presentation has a clear storyline and agenda. Main ideas are broken into bite-sized statements for your slides and complemented with visuals. All you have left is to figure out how you begin presenting.
The best way is to appeal to and invoke certain emotions in your audience – curiosity, surprise, fear, or good old amusements. Also, it is recommended to present your main idea in the first 30 seconds of the presentation. And here’s how it’s done.
1. The Classic Trick: Open a Presentation with an Introduction

When you don’t feel like reinventing the wheel, use a classic trick from the book – start with a quick personal introduction. Don’t want to sound as boring as everyone else with your humble “Hi, I’m John, the head of the Customer Support Department”? Great, because we are all about promoting effective presentation techniques (hint: using a dull welcome slide isn’t one of them).
Here’s how to introduce yourself in a presentation the right way.
a. Use a link-back memory formula
To ace a presentation, you need to connect with your audience. The best way to do so is by throwing in a simple story showing who you are, where you came from, and why your words matter.
The human brain loves a good story, and we are more inclined to listen and retain the information told this way. Besides, when we can relate to the narrator (or story hero), we create an emotional bond with them, and, again – become more receptive, and less skeptical of the information that is about to be delivered.
So here are your presentation introduction lines:
My name is Joanne, and I’m the Head of Marketing at company XYZ. Five years ago I was working as a waitress, earning $10/hour and collecting rejection letters from editors. About ten letters every week landed to my mailbox. You see, I love words, but decent publisher thought mine were good enough. Except for the restaurant owner. I was very good at up-selling and recommending dishes to the customers. My boss even bumped my salary to $15/hour as a token of appreciation for my skill. And this made me realize: I should ditch creative writing and focus on copywriting instead. After loads of trial and error back in the day, I learned how to write persuasive copy. I was no longer getting rejection letters. I was receiving thousands of emails saying that someone just bought another product from our company. My sales copy pages generated over $1,500,000 in revenue over last year. And I want to teach you how to do the same”
b. Test the Stereotype Formula
This one’s simple and effective as well. Introduce yourself by sharing an obvious stereotype about your profession. This cue will help you connect with your audience better, make them chuckle a bit, and set a lighter mood for the speech to follow.
Here’s how you can frame your intro:
“My name is ___, and I am a lead software engineer at our platform [Your Job Title]. And yes, I’m that nerdy type who never liked presenting in front of large groups of people. I would rather stay in my den and write code all day long. [Stereotype]. But hey, since I have mustered enough courage…let’s talk today about the new product features my team is about to release….”
After sharing a quick, self-deprecating line, you transition back to your topic, reinforcing the audience’s attention . Both of these formulas help you set the “mood” for your further presentation, so try using them interchangeably on different occasions.
2. Open a Presentation with a Hook
Wow your audience straight off the bat by sharing something they would not expect to hear. This may be one of the popular first-time presentation tips but don’t rush to discard it.
Because here’s the thing: psychologically , we are more inclined to pay attention whenever presented with an unexpected cue. When we know what will happen next – someone flips the switch, and lights turn on – we don’t really pay much attention to that action.
But when we don’t know what to expect next – e.g., someone flips the switch and a bell starts ringing – we are likely to pay more attention to what will happen next. The same goes for words: everyone loves stories with unpredictable twists. So begin your presentation with a PowerPoint introduction slide or a line that no one expects to hear.
Here are a few hook examples you can swipe:
a. Open with a provocative statement
It creates an instant jolt and makes the audience intrigued to hear what you are about to say next – pedal back, continue with the provocation, or do something else that they will not expect.

“You will live seven and a half minutes longer than you would have otherwise, just because you watched this talk.”
That’s how Jane McGonigal opens one of her TED talks . Shocking and intriguing, right?
b. Ask a rhetorical, thought-provoking question
Seasoned presenters know that one good practice is to ask a question at the beginning of a presentation to increase audience engagement. Rhetorical questions have a great persuasive effect – instead of answering aloud, your audience will silently start musing over it during your presentation. They aroused curiosity and motivated the audience to remain attentive, as they did want to learn your answer to this question.
To reinforce your message throughout the presentation, you can further use the Rhetorical Triangle Concept – a rhetorical approach to building a persuasive argument based on Aristotle’s teachings.
c. Use a bold number, factor stat
A clean slide with some mind-boggling stat makes an undeniably strong impact. Here are a few opening statement examples you can use along with your slide:
- Shock them: “We are effectively wasting over $1.2 billion per year on producing clothes no one will ever purchase”
- Create empathy: “Are you among the 20% of people with undiagnosed ADHD?”
- Call to arms: “58% of marketing budgets are wasted due to poor landing page design. Let’s change this!”
- Spark curiosity: “Did you know that companies who invested in speech recognition have seen a 13% increase in ROI within just 3 years?”
3. Begin with a Captivating Visual
Compelling visuals are the ABC of presentation design – use them strategically to make an interesting statement at the beginning and throughout your presentation. Your first presentation slide can be text-free. Communicate your idea with a visual instead – a photo, a chart, an infographic, or another graphics asset.
Visuals are a powerful medium for communication as our brain needs just 13 milliseconds to render what our eyes see, whereas text comprehension requires more cognitive effort.
Relevant images add additional aesthetic appeal to your deck, bolster the audience’s imagination, and make your key message instantly more memorable.
Here’s an intro slide example. You want to make a strong presentation introduction to global pollution. Use the following slide to reinforce the statement you share:

“Seven of nine snow samples taken on land in Antarctica found chemicals known as PFAs, which are used in industrial products and can harm wildlife”
Source: Reuters
4. Ask a “What if…” Question
The “what if” combo carries massive power. It gives your audience a sense of what will happen if they choose to listen to you and follow your advice. Here are a few presentations with starting sentences + slides to illustrate this option:

Alternatively, you can work your way to this point using different questions:
- Ask the audience about their “Why.” Why are they attending this event, or why do they find this topic relevant?
- Use “How” as your question hook if you plan to introduce a potential solution to a problem.
- If your presentation has a persuasion factor associated, use “When” as a question to trigger the interest of the audience on, for example, when they are planning to take action regarding the topic being presented (if we talk about an inspirational presentation).

5. Use the Word “Imagine”
“Imagine,” “Picture This,” and “Think of” are better word choices for when you plan to begin your presentation with a quick story.
Our brain loves interacting with stories. In fact, a captivating story makes us more collaborative. Scientists have discovered that stories with tension during narrative make us:
- Pay more attention,
- Share emotions with the characters and even mimic the feelings and behaviors of those characters afterward.
That’s why good action movies often feel empowering and make us want to change the world too. By incorporating a good, persuasive story with a relatable hero, you can also create that “bond” with your audience and make them more perceptive to your pitch – donate money to support the cause; explore the solution you are offering, and so on.
6. Leverage The Curiosity Gap
The curiosity gap is another psychological trick frequently used by marketers to solicit more clicks, reads, and other interactions from the audience. In essence, it’s the trick you see behind all those clickbait, Buzzfeed-style headlines:

Not everyone is a fan of such titles. But the truth is – they do the trick and instantly capture attention. The curiosity gap sparks our desire to dig deeper into the matter. We are explicitly told that we don’t know something important, and now we crave to change that. Curiosity is an incredibly strong driving force for action – think Eve, think Pandora’s Box.
So consider incorporating these attention grabbers for your presentation speech to shock the audience. You can open with one, or strategically weave them in the middle of your presentation when you feel like your audience is getting tired and may lose their focus.
Here’s how you can use the curiosity gap during your presentation:
- Start telling a story, pause in the middle, and delay the conclusion of it.
- Withhold the key information (e.g., the best solution to the problem you have described) for a bit – but not for too long, as this can reduce the initial curiosity.
- Introduce an idea or concept and link it with an unexpected outcome or subject – this is the best opening for a presentation tip.
7. The Power of Silence
What would you do if you attended a presentation in which the speaker remains silent for 30 seconds after the presentation starts? Just the presenter, standing in front of the audience, in absolute silence.
Most likely, your mind starts racing with thoughts, expecting something of vital importance to be disclosed. The surprise factor with this effect is for us to acknowledge things we tend to take for granted.
It is a powerful resource to introduce a product or to start an inspirational presentation if followed by a fact.
8. Facts as Weapons of Communication
In some niches, using statistics as the icebreaker is the best method to retain the audience’s interest.
Say your presentation is about climate change. Why not introduce a not-so-common fact, such as the amount of wool that can be produced out of oceanic plastic waste per month? And since you have to base your introduction on facts, research manufacturers that work with Oceanic fabrics from recycled plastic bottles .
Using facts helps to build a better narrative, and also gives leverage to your presentation as you are speaking not just from emotional elements but from actually recorded data backed up by research.
9. Fact vs. Myths
Related to our previous point, we make quite an interesting speech if we contrast a fact vs. a myth in a non-conventional way: using a myth to question a well-accepted fact, then introducing a new point of view or theory, backed on sufficient research, that proves the fact wrong. This technique, when used in niches related to academia, can significantly increase the audience’s interest, and it will highlight your presentation as innovative.
Another approach is to debunk a myth using a fact. This contrast immediately piques interest because it promises to overturn commonly held beliefs, and people naturally find it compelling when their existing knowledge is put to the test. An example of this is when a nutritionist wishes to speak about how to lose weight via diet, and debunks the myth that all carbohydrates are “bad”.
10. The Power of Music
Think about a presentation that discusses the benefits of using alternative therapies to treat anxiety, reducing the need to rely on benzodiazepines. Rather than going technical and introducing facts, the presenter can play a soothing tune and invite the audience to follow an exercise that teaches how to practice breathing meditation . Perhaps, in less than 2 minutes, the presenter can accomplish the goal of exposing the advantages of this practice with a live case study fueled by the proper ambiance (due to the music played in the beginning).
11. Physical Activity
Let’s picture ourselves in an in-company presentation about workspace wellness. For this company, the sedentary lifestyle their employees engage in is a worrying factor, so they brought a personal trainer to coach the employees on a basic flexibility routine they can practice in 5 minutes after a couple of hours of desk time.
“Before we dive in, let’s all stand up for a moment.” This simple instruction breaks the ice and creates a moment of shared experience among the attendees. You could then lead them through a brief stretching routine, saying something like, “Let’s reach up high, and stretch out those muscles that get so tight sitting at our desks all day.” With this action, you’re not just talking about workplace wellness, you’re giving them a direct, personal experience of it.
This approach has several advantages. Firstly, it infuses energy into the room and increases the oxygen flow to the brain, potentially boosting the audience’s concentration and retention. Secondly, it sets a precedent that your presentation is not going to be a standard lecture, but rather an interactive experience. This can raise the level of anticipation for what’s to come, and make the presentation a topic for future conversation between coworkers.
12. Acknowledging a Person
How many times have you heard the phrase: “Before we begin, I’d like to dedicate a few words to …” . The speaker could be referring to a mentor figure, a prominent person in the local community, or a group of people who performed charity work or obtained a prize for their hard work and dedication. Whichever is the reason behind this, acknowledgment is a powerful force to use as a method of starting a presentation. It builds a connection with the audience, it speaks about your values and who you admire, and it can transmit what the conversation is going to be about based on who the acknowledged person is.
Closing Thoughts
Now you know how to start your presentation – you have the opening lines, you have the slides to use, and you can browse even more attractive PowerPoint presentation slides and templates on our website. Also, we recommend you visit our article on how to make a PowerPoint Presentation to get familiarized with the best tactics for professional presentation design and delivery, or if you need to save time preparing your presentation, we highly recommend you check our AI Presentation Maker to pair these concepts with cutting-edge slide design powered by AI.
Like this article? Please share
Curiosity Gap, Opening, Public Speaking, Rhetorical Triangle, Speech, What If Filed under Presentation Ideas
Related Articles

Filed under Presentation Ideas • September 5th, 2023
Persuasive Speech: Actionable Writing Tips and Sample Topics
Business professionals, students, and others can all benefit from learning the principles of persuasive speech. After all, the art of persuasion can be applied to any area of life where getting people to agree with you is important. In this article, we get into the basics of persuasive speaking, persuasive speech writing, and lastly persuasive speech topics.

Filed under Presentation Ideas • August 5th, 2023
How Parkinson’s Law Can Make Your Presentations Better
Sometimes even the best presenters procrastinate their work until the very last moment. And then, suddenly, they get a flow of ideas to complete their slide deck and present like they have been preparing for it for ages. However, doing so has drawbacks, as even professional presenters cannot always elude the side effects of […]

Filed under Presentation Ideas • April 29th, 2022
How to Become Great in Public Speaking: Presenting Best Practices
Public Speaking takes a lot of practice and grit, however, it also requires a method that can help you through your presentation. Explore more about this subject in this blog post.
5 Responses to “How to Start a Presentation: 5 Strong Opening Slides and 12 Tricks To Test”
I love to follow the ideas, it’s good for a freshman
Leave a Reply
17 PowerPoint Presentation Tips From Pro Presenters [+ Templates]
Published: April 26, 2024
PowerPoint presentations can be professional, attractive, and really help your audience remember your message.

If you don’t have much experience, that’s okay — I’m going to arm you with PowerPoint design tips from pro presenters, the steps you need to build an engaging deck, and templates to help you nail great slide design.
![→ Free Download: 10 PowerPoint Presentation Templates [Access Now]](https://no-cache.hubspot.com/cta/default/53/2d0b5298-2daa-4812-b2d4-fa65cd354a8e.png "slides in presentations")
Download Now
Buckle up for a variety of step-by-step explanations as well as tips and tricks to help you start mastering this program. There are additional resources woven in, and you’ll find expert perspectives from other HubSpotters along the way.
Table of Contents
How to Make a PowerPoint Presentation
Powerpoint presentation tips.
Microsoft PowerPoint is like a test of basic professional skills, and each PowerPoint is basically a presentation made of multiple slides.
Successful PowerPoints depend on three main factors: your command of PowerPoint's design tools, your attention to presentation processes, and being consistent with your style.
Keep those in mind as we jump into PowerPoint's capabilities.
Getting Started
1. open powerpoint and click ‘new.’.
A page with templates will usually open automatically, but if not, go to the top left pane of your screen and click New . If you’ve already created a presentation, select Open and then double-click the icon to open the existing file.

10 Free PowerPoint Templates
Download ten free PowerPoint templates for a better presentation.
- Creative templates.
- Data-driven templates.
- Professional templates.
Download Free
All fields are required.
You're all set!
Click this link to access this resource at any time.
Creating PowerPoint Slides
3. insert a slide..
Insert a new slide by clicking on the Home tab and then the New Slide button. Consider what content you want to put on the slide, including heading, text, and imagery.

- Finally, PowerPoint Live is a new tool that enables you to do more seamless presentations during video calls and may be a better overall match for doing presentations remotely. Check out this video:
11. Try Using GIFs.

12 Free Customizable Resume Templates
Fill out this form to access your free professionally-designed templates, available on:
- Microsoft Word
- Google Docs
- Microsoft PowerPoint
- Google Slides
15. Embed multimedia.
PowerPoint allows you to either link to video/audio files externally or to embed the media directly in your presentation. For PCs, two great reasons for embedding are:
- Embedding allows you to play media directly in your presentation. It will look much more professional than switching between windows.
- Embedding also means that the file stays within the PowerPoint presentation, so it should play normally without extra work (except on a Mac).
If you use PowerPoint for Mac it gets a bit complicated, but it can be done:
- Always bring the video and/or audio file with you in the same folder as the PowerPoint presentation.
- Only insert video or audio files once the presentation and the containing folder have been saved on a portable drive in their permanent folder.
- If the presentation will be played on a Windows computer, then Mac users need to make sure their multimedia files are in WMV format.
- Consider using the same operating system for designing and presenting, no matter what.
16. Bring your own hardware.
Between operating systems, PowerPoint is still a bit jumpy. Even between differing PPT versions, things can change. The easiest fix? Just bring along your own laptop when you're presenting.
The next easiest fix is to upload your PowerPoint presentation into Google Slides as a backup option — just make sure there is a good internet connection and a browser available where you plan to present.
Google Slides is a cloud-based presentation software that will show up the same way on all operating systems.
To import your PowerPoint presentation into Google Slides:
- Navigate to slides.google.com . Make sure you’re signed in to a Google account (preferably your own).
- Under Start a new presentation , click the empty box with a plus sign. This will open up a blank presentation.
- Go to File , then Import slides .
- A dialog box will come up. Tap Upload.
- Click Select a file from your device .
- Select your presentation and click Open .
- Select the slides you’d like to import. If you want to import all of them, click All in the upper right-hand corner of the dialog box.
- Click Import slides.
When I tested this out, Google Slides imported everything perfectly, including a shape whose points I had manipulated. This is a good backup option to have if you’ll be presenting across different operating systems.
17. Use Presenter View.
In most presentation situations, there will be both a presenter’s screen and the main projected display for your presentation.
PowerPoint has a great tool called Presenter View, which can be found in the Slide Show tab of PowerPoint. Included in the Presenter View is an area for notes, a timer/clock, and a presentation display.
For many presenters, this tool can help unify their spoken presentation and their visual aid. You never want to make the PowerPoint seem like a stack of notes that you’re reading off of.
Use the Presenter View option to help create a more natural presentation.
Pro Tip: At the start of the presentation, you should also hit CTRL + H to make the cursor disappear. Hitting the “A” key will bring it back if you need it.
Your Next Great PowerPoint Presentation Starts Here
Now that you have these style, design, and presentation tips under your belt, you should feel confident to create your PowerPoint presentation.
But if you can explore other resources to make sure your content hits the mark. After all, you need a strong presentation to land your point and make an impression.
With several templates to choose from — both in PowerPoint and available for free download — you can swiftly be on your way to creating presentations that wow your audiences.
Editor's note: This post was originally published in September 2013 and has been updated for comprehensiveness.
![Blog - Beautiful PowerPoint Presentation Template [List-Based]](https://no-cache.hubspot.com/cta/default/53/013286c0-2cc2-45f8-a6db-c71dad0835b8.png "slides in presentations")
Don't forget to share this post!
Related articles.
![How to Create the Best PowerPoint Presentations [Examples & Templates]](https://knowledge.hubspot.com/hubfs/powerpoint.webp "slides in presentations")
How to Create the Best PowerPoint Presentations [Examples & Templates]
![How to Write an Ecommerce Business Plan [Examples & Template]](https://www.hubspot.com/hubfs/ecommerce%20business%20plan.png "slides in presentations")
How to Write an Ecommerce Business Plan [Examples & Template]
![How to Create an Infographic in Under an Hour — the 2024 Guide [+ Free Templates]](https://www.hubspot.com/hubfs/Make-infographic-hero%20%28598%20%C3%97%20398%20px%29.jpg "slides in presentations")
How to Create an Infographic in Under an Hour — the 2024 Guide [+ Free Templates]
![20 Great Examples of PowerPoint Presentation Design [+ Templates]](https://www.hubspot.com/hubfs/powerpoint-presentation-examples.webp "slides in presentations")
20 Great Examples of PowerPoint Presentation Design [+ Templates]

Get Buyers to Do What You Want: The Power of Temptation Bundling in Sales

How to Create an Engaging 5-Minute Presentation
![How to Start a Presentation [+ Examples]](https://www.hubspot.com/hubfs/how-to-start-presenting.webp "slides in presentations")
How to Start a Presentation [+ Examples]

120 Presentation Topic Ideas Help You Hook Your Audience

The Presenter's Guide to Nailing Your Next PowerPoint
![How to Create a Stunning Presentation Cover Page [+ Examples]](https://www.hubspot.com/hubfs/presentation-cover-page_3.webp "slides in presentations")
How to Create a Stunning Presentation Cover Page [+ Examples]
Marketing software that helps you drive revenue, save time and resources, and measure and optimize your investments — all on one easy-to-use platform
- Help Center
- Get started
- Learn by product
- Learn by role & industry
- Hybrid workplace tips
- Gen AI tips
- Productivity tips
- Business tutorials
- Switch from Microsoft & others
- Support & accessibility
- Google Workspace
- Privacy Policy
- Terms of Service
- Submit feedback
- What's new?
- Get started Welcome Get ready to switch What to do on your first day Your first week & beyond Cheat sheets & reference guides Open Google Workspace apps
- Learn by product Calendar Chat Chrome browser Docs Drive Gemini Gmail Meet Sheets Slides Vids Managed teams Mobile & device setup All products
- Learn by role & industry Administrative assistants Digital marketing Finance Healthcare Human resources Law practices Manufacturing Media & entertainment Nonprofits Professional services Project management Research & development Retail Sales & marketing Technical support UX design Visual design Web development
- Hybrid workplace tips Hybrid work training & help Use Meet Companion mode Stay connected when working remotely Work from home Work with remote teams Plan & hold meetings from anywhere Hold large remote events Work with non-Google Workspace users
- Gen AI tips Generative AI training & help Get started with Gemini Gemini cheat sheet Role-specific prompts & use cases Tips for writing prompts for Gemini Gemini usage limits Learn about generative AI
- Productivity tips Set up business meetings Discuss topics with your team Brainstorm with colleagues Improve communication Make video conference calls Create great presentations Create strong proposals Onboard team members Optimize your inbox Analyze data Clean up data Go paperless
- Business tutorials Use generative AI at work Plan & manage a project Plan & hold meetings from anywhere Hold large remote events Stay connected when working remotely Collaborate with decision makers Share a final document Free up storage space Plan a project with external clients Delegate work when you're OOO Get up to speed after time off Additional training resources
- Switch from Microsoft & others Switch from Microsoft Switch from Slack Switch from Zoom, Skype, or Webex Switch from Box, Dropbox, or C:\ drive Switch from HCL Notes
- Support & accessibility Support for users Support for administrators Accessibility Save or customize Learning Center guides
Bring your best ideas to life with Gemini for Google Workspace. Get tips & real-life use cases for using gen AI at work .
Get started with Slides in Google Workspace
Create your first presentation in slides.
On this page
Create or import a presentation, add slides to your presentation.
- Update your presentation
Want advanced Google Workspace features for your business?
Try Google Workspace today!
Create your presentation
- Open the Slides home screen at Google Slides .
You can also create new presentations from the URL https://slides.google.com/create .
Import and convert an existing presentation
Converting your file from another program creates a copy of your original file in a Docs, Sheets, or Slides format. You can then edit the file in your browser.
If you have existing files, you can import and convert them to Docs, Sheets, or Slides.
- Go to Drive .
- Choose the file you want to import from your computer to add it to Drive.
Have a Microsoft file?
If you've already stored Microsoft files in Drive, you can also update them without converting them .
Add a slide with the same layout as the current slide
- On your computer, open a presentation in Google Slides .
Add a slide with a different layout
- Choose a slide.
Add a slide with your organization's branding
- At right, click the template you want to use.
Note: The Templates option appears only if your administrator makes organization-branded slides available.
Update your presentation
Choose a theme and layout.
When you first create a presentation, you can choose a theme for your slides. A theme is a preset group of colors, fonts, background, and layouts. Your presentation's layout is the way your text and images are arranged on a slide.
Change your presentation's theme
- On the right, click the theme you want.
Change the layout of your presentation
- Select a slide.
- At the top, click Layout .
- Choose the layout you want to use.
Arrange slides
Move slide —Drag the slide to a different position in the presentation. To move several slides at once, Ctrl+click multiple slides before dragging them.
Delete slide —Right-click the slide and select Delete .
Duplicate slide —Right-click the slide in the sidebar and select Duplicate slide .
Add pictures, text, speaker notes, and more
Rename your presentation —Click Untitled presentation and enter a new name.
Add videos, shapes, charts, and more —Click Insert to add videos, shapes, charts, slide numbers, and other features to your presentation. You can also move, delete, or re-size these inserted features.
Add speaker notes —Use speaker notes to keep track of your talking points for each slide. In the presentation editor, speaker notes appear beneath the current slide. When you present your slides, your speaker notes show in a separate window.
Google, Google Workspace, and related marks and logos are trademarks of Google LLC. All other company and product names are trademarks of the companies with which they are associated.
Was this helpful?
Learn how to print Learning Center guides, save them as PDFs, or customize them for your organization.
- Presentations
- Most Recent
- Infographics
- Data Visualizations
- Forms and Surveys
- Video & Animation
- Case Studies
- Design for Business
- Digital Marketing
- Design Inspiration
- Visual Thinking
- Product Updates
- Visme Webinars
- Artificial Intelligence
13 PowerPoint Presentation Tips to Create Engaging Presentations

Written by: Chloe West
Have to create a PowerPoint presentation and dread it? Your presentations don’t always have to be dry, boring and limited. With these PowerPoint presentation tips, you’ll be able to put together a dynamic and engaging presentation.
Let’s start from the very beginning before you even open up your presentation tool.
- Start by writing out your talking points.
- Get creative with your slide design.
- Keep your design consistent throughout.
- Make your presentation interactive.
- Add animation.
- Put together seamless transitions.
- Use text creatively.
- Align objects with the grid.
- Create non-linear presentations.
- Place shapes strategically.
- Crop images into shapes.
- Utilize the presenter notes.
- Use a dynamic presentation software.
1. Start by writing out your talking points.
The first thing you need to do, before even considering your presentation design, is to write out your talking points and outline your speech.
Pay attention to popular and engaging presentation structures so you know the framework you want to follow throughout your talk. This will also make it easier to create an outline that focuses on each of your talking points.
Once you’ve put together an outline that represents your topic and touches on each important element you need to cover, you can start searching for a PowerPoint presentation template that will fit your topic.
Or, you can start browsing through Visme’s presentation templates below.
Presentation Templates

Ecommerce Webinar Presentation

Buyer Presentation
PixelGo Marketing Plan Presentation

Product Training Interactive Presentation

Company Ethics Presentation

Work+Biz Pitch Deck - Presentation
Create your presentation View more templates
2. Get creative with your PowerPoint presentation slide design.
When it comes to putting your content onto your PowerPoint presentation slides, you want to be sure your slides are clean, easy to read and engaging.
This means you should try out a variety of different creative themes. And while we have a post with over 100 creative presentation ideas you should check out, here are a few ways to really make your slideshow stand out.
Use more design elements than photos.

While a photo collage or stock image background tends to be PowerPoint presentation go-to’s, we’re trying to empower you to do something different!
Take a page out of this template’s book by taking advantage of different design elements. Here, we see a solid colored background, shapes, icons and text decorating the slides of this presentation.
In this example PowerPoint slides, we do still see a photo added to emphasize the point on one of the slides, but it’s used as a design element rather than the foundation of the slide.
Use a bold color scheme.

When customizing example PowerPoint slides , your color palette matters. Using a more bold and bright color scheme is a great way to grab audience attention and make yourself seem more serious about your topic.
A more powerful color scheme makes an impression on your viewers, helping them to further see you as an authority on the information you’re sharing.
This example PowerPoint slides uses a bold blue and orange color scheme to stand out. To get an idea for a color palette for your next presentation, take a look at these 50 combinations .
Hey marketers! Need to create scroll-stopping visual content fast?
- Transform your visual content with Visme’s easy-to-use content creation platform
- Produce beautiful, effective marketing content quickly even without an extensive design skillset
- Inspire your sales team to create their own content with branded templates for easy customization
Sign up. It’s free.

3. Keep your design consistent throughout.
We just shared a couple of different presentation templates available with our platform in the last point. What do you notice?
Here’s another example for you to take a look at.

All of the example PowerPoint slides have a similar look and feel, creating a cohesive presentation deck that looks intentional and professionally designed.
Imagine if you were sitting in a presentation that looked something like this.

This looks messy and cluttered. It’s an amateur-looking design, and your audience will be confused about how these slides make any sense together.
Because keeping your design consistent is an essential part of creating an engaging presentation, we’ve also created a few different presentation themes with hundreds of example PowerPoint slides that all follow the same design theme.
Here’s an example of our Modern presentation theme below with over 900 different slides so that you can find a variety of slides perfect for your next slide deck.

4. Make your presentation interactive.
One way to create a really dynamic presentation that will keep your audience engaged and create a memorable experience is to make your presentation interactive.
While we’ve covered 17 ways to create an interactive presentation before, let’s go over how you can do this using a tool like Visme.
PowerPoint is widely known as the go-to presentation software, but there are so many alternatives that can lead you to a better solution and a better end result.
In Visme’s presentation maker, you can easily add links to any object in your presentation that lead to web pages, other slides within your presentation or create popup or hover effects with other objects on your slide.

Simply click on the element that you want to add a link to, head to the Actions menu, then select which type of interactive link you want to add.
You’re also able to create interactive maps and data visualizations that allow you or your viewers to hover over each element in your visual to see more information.
Here’s an example of an interactive map that you can easily create to showcase more information in a more digestible format.
Visme also allows you to embed external content like videos, polls, forms, surveys, quizzes and more. Plus, there are several third-party integrations you can use to embed and connect even more interactive content.
5. Add animation.
Another way to help your slides stand out is by adding in animated elements. Try to incorporate enter and exit effects for various objects on your slides to grab your audience’s attention as new slides fly onto the screen.
Here’s a great example of how this could look.
Or, if you put together your PowerPoint presentation slides with a different tool – like Visme, wink wink – you can gain access to even more animated elements.
Visme provides users with fully customizable animated illustrations, icons, shapes and more that can have their size, colors and animation speed updated to fit your needs.

These illustrations can be perfect for adding even more depth to your presentation slides, especially when it comes to your title slides and section headers to help break up your presentation.
6. Put together seamless transitions.
When customizing example PowerPoint slides, you want to put a creative spin on it. Instead of having one slide disappear for another to appear in full, why not try out some creative transitions?
It’s important for us to note that if you find a transition you like, you should stick with it throughout your presentation. This goes back to our point about cohesive design. You want everything to flow well.
This means that you don’t want to throw a ton of different slide designs, animation types and transitions into the mix, or you’ll end up with a cluttered and hard-to-follow presentation deck.
Visme’s unique transitions offer not just slide transitions, but a way to seamlessly transition all of your elements onto the screen as well.
Take a look at this presentation below to see how this looks. Click through the slides to see them transition.
To get this effect, simply choose one of the following transitions that also show the slide elements following suit after the background appears.

Ready to create your own presentation in minutes?
- Add your own text, images and more
- Customize colors, fonts and everything else
- Choose from hundreds of slide designs and templates
- Add interactive buttons and animations
7. Use text creatively.
There are hundreds of fonts to choose from, so how do you know the best ones to use and how to make them stand out on your slides?
First, you can check out our guide to font pairing to understand some basics for choosing the right fonts for your slides.
For example, make sure you’re using 3 fonts max, and that each has a specific role in your presentation, as you see below.

Once you’ve chosen your preferred fonts, whether you look through our selections of top fonts , modern fonts , pretty fonts or elsewhere, start considering how you can use them creatively in your presentation design.
Pro Tip: It’s important to remember that in a presentation, you won’t have many words on the screen. So you want to make sure the text that you do include focuses on your main point of each slide and grabs attention.
Let’s cover a few ways that you can use text creatively and really make your slides stand out to your viewers.
Surround your text with shapes.

If you really want to make certain words pop off the slide, add a shape behind them like you see in this presentation about dinosaurs above.
While this is more of an informational presentation, this tactic can also be used for business-related presentations as well.
Simply search through Visme’s library of shapes for something that matches your theme and set it behind your content.
Place your text on the white space of a photo.

Try positioning your photos strategically and utilizing pictures with more white space than you normally would. This helps you find the perfect spot to place your text so that it’s easy for your audience to read while still being visual.
In the above example PowerPoint slides, these minimalistic nature photos are the perfect backdrop for the text, providing tons of white space while still offering texture and visual elements.
Use color overlays.

Another great way to really make your words pop is by adding a translucent color overlay on top of your background photo.
Incorporating a photo into your presentation slide helps create more depth and visualize the words you’re saying, but you still want to be able to have your text be legible throughout the slide deck.
8. Align objects with the grid.
When using a tool like Visme to create your presentation, you can turn on a grid that allows you to ensure your design elements are properly aligned and perfectly symmetrical.
To access the grid in Visme’s editor, click the hamburger menu, then go to View Options , then toggle the Show grid option to turn it on.

You can set the size you want your grid to be to strategically align elements around your slide as well as set how opaque the grid lines are.
9. Create non-linear presentations.
You don’t have to go from slide to slide in your PowerPoint presentation. In fact, there are endless options for how you could navigate between slides when presenting.
Whether you let the audience decide the direction of your presentation by offering them different options to choose from, you create a navigation bar for your presentation or you allow yourself to determine the flow as you go by adding a progress bar, you have tons of options.
Here’s a great example of what your presentation could look like with a navigation menu within your slides.
10. Place shapes strategically.
Don’t underestimate the power of shapes in your presentation design. Or any design, really.
Using various geometric shapes or even shapes you may not have heard of before to draw attention to various elements on the screen is a great design practice.
Our Creative presentation theme – with over 300 different slide layouts – is a great example of using shapes strategically to add design elements and emphasize various parts of your content.

Visme presentation maker has a library full of different types of shapes that can be used in diagrams, as backgrounds to icons , to frame text and so much more.
Put together a set of guidelines for which shapes you plan to use in your presentation and stick to no more than two or three different shapes throughout. While you can resize them based on your needs, you don’t want to clutter your slides.
11. Crop images into shapes.
Back with the shapes! Another creative way to bring shapes into your designs is to crop photos into different geometric shapes.
The presentation template below is the perfect example for how you can visually incorporate these cropped images into your slide design.

It’s easy to do this with a tool like Visme. Simply drag and drop your choice of photo from the photo library in the left sidebar onto your slide, click it, choose Frames in the navigation bar and choose the one that fits your design.
Take a look at a few of the frames available in our software.

12. Utilize presenter notes.
Want to really give a good presentation ? It’s important not to read off the slide and actually speak directly to your audience throughout your PowerPoint presentation.
One great way to keep yourself on task and ensure you don’t skip over any important information is to take advantage of presenter notes available to you when up on stage or in front of your audience presenting.
Visme has dynamic and comprehensive presenter notes built in that help ease the pressure of presenting.
Take a look below at what you can expect to see on your screen when presenting – all while your audience only sees the slide you’re showcasing.
You get access to the time of your presentation, the current slide, the slide you can expect next to help with the flow of your slideshow and the notes you’ve prepared for your talking points.
13. Use a dynamic presentation software.
The last way to create an amazing and engaging PowerPoint presentation is to use a dynamic presentation software that isn’t PowerPoint.
I know what you’re thinking – how can you deliver a PowerPoint by using a different software?
With a tool like Visme, you’ll get tons of premade example PowerPoint slides to choose from. You’re able to both import existing PowerPoints to edit and spice them up and export editable PowerPoints to present offline and make any last minute changes.
When creating your presentation, you can use Dynamic Fields to automatically update key information throughout the slides. You can also personalize the fields and apply them to other projects.
Our analytics tool helps you track the performance of your presentation. You can track views, unique visits, average time, average completion and a host of other key metrics.
Learn more about turning your Vismes into PowerPoint presentations in this quick tutorial video.

Start improving your PowerPoint presentations with Visme.
Ready to start creating PowerPoint presentations with Visme? Sign up for a business account today and improve your brand and the presentations you share with your audience. Start creating engaging and interactive presentations that your viewers will love.
Create beautiful presentations faster with Visme.

Trusted by leading brands
Recommended content for you:
![15 Best AI Presentation Makers in 2024 [Free & Paid]](https://visme.co/blog/wp-content/uploads/2023/11/Best-AI-Presentation-Makers-in-2024-Thumbnail-500x280.jpg "slides in presentations")
Create Stunning Content!
Design visual brand experiences for your business whether you are a seasoned designer or a total novice.
About the Author
Chloe West is the content marketing manager at Visme. Her experience in digital marketing includes everything from social media, blogging, email marketing to graphic design, strategy creation and implementation, and more. During her spare time, she enjoys exploring her home city of Charleston with her son.
How-To Geek
The beginner's guide to google slides.

Your changes have been saved
Email Is sent
Please verify your email address.
You’ve reached your account maximum for followed topics.
How to Clean a Link Before You Share It (And Why You Should)
Thunderbird's big "nebula" update is now available, psa: google maps can tell you when to leave to arrive on time, quick links, what is google slides, how to sign up for an account, how to create a blank presentation, how to import a microsoft powerpoint presentation, how to check your spelling in google slides, how to collaborate on presentations, how to see all recent changes to a presentation, how to link to a specific slide, how to insert special characters into a slide, how to use google slides offline.
If you’re just getting started with Google Slides, its extensive features and add-ons can be a little overwhelming. Here are some tips to help you get going with this powerful alternative to Microsoft PowerPoint.
If you’ve heard of Google Slides before, feel free to skip ahead; if you haven't, here’s a crash course on what you need to know. We’ll go over the basics and get you brushed up on what Google Slides is and how you can get started right away.
Slides is a free, web-based presentation program designed to compete with Microsoft Office PowerPoint. It's part of G Suite---Google's complete office suite (though some people refer to it all as Google Docs). The other main services included in the cloud-based suite are Sheets (Excel) and Docs (Word).
Related: What is Google Workspace, Anyway?
Google Slides is available on all devices and platforms; all you need is an internet connection and a web browser (or, in the case of mobile, the Android and iOS apps ). Google does the rest and handles the brunt of the heavy lifting, while it runs the software in the cloud.
Slides supports several file types, including .ppt, .pptx , .odp, .jpg, .svg, and .pdf. This makes it easy to view or convert Microsoft Office files directly from Google Drive or insert images directly into a slide.
Related: What Is a PPTX File (and How Do I Open One)?
And since Slides is an online presentation program, you can share and collaborate with multiple people on the same file, and track revisions, changes, and suggestions, all in real-time.
Have you heard enough? Let’s get started.
Before you can use Google Slides, you have to sign up for a Google account (an @gmail account). If you already have one, feel free to move on to the next section. If not, we’ll go over the simplest way to create a Google account and get you set up with Slides.
Head over to accounts.google.com , click "Create Account," and then click "For Myself."

On the next page, you provide some information---first and last name, username, and password---to create your account.

Also, you have to verify your phone number, so Google can make sure you’re not a bot.

After you verify your phone number, the subsequent pages require you to provide a recovery email address and your date of birth and gender. You must also agree to the privacy statement and terms of service. After that, you’re the proud new owner of a Google account.
Now that you have a Google account, it’s time to create your first presentation. Head over to Google Slides and place the cursor on the multicolored "+" icon in the bottom-right corner.

The + turns into a black pencil icon; click it.

Pro Tip: Type
into the address bar from any browser and hit Enter to automatically create and open a new blank document.

Even if you’re new to Google Slides, you might already have a collection of Microsoft PowerPoint files you’d like to be able to use. If that’s the case, then you have to upload all your presentations before you can view them. While it might not support some of the more advanced features and effects of some PowerPoint presentations, it works pretty well.
When you import a PowerPoint presentation, you can use either Google Slides or Drive to upload your files. Both methods let you drag and drop a file from your computer directly into the web browser for easy uploads. Your Drive houses all of your uploaded files, but---for the sake of convenience---when you go to the Slides homepage, it only shows you presentation-type files.

From the Slides homepage, click the folder icon in the top right, and then click the "Upload" tab. Now, drag and drop any files you want to upload directly into this window.

Once the file uploads, Slides opens it automatically, and it's ready for you to edit, share, or collaborate.
To open a PowerPoint presentation that you want to edit, click the filename with the "P" next to it from your Google Slides homepage.

Click to either view the PowerPoint file or edit it in Slides.

After you’ve finished editing your file, you can download and export your presentation back into a Microsoft PowerPoint format. Just go to File > Download As, and then click the "Microsoft PowerPoint" option.

If you’d rather download your presentation as a PDF, ODP, JPEG, TXT, etc., you can do that here, as well.

Related: How to Import a PowerPoint Presentation into Google Slides
Now that you have a few presentations, it’s time to make sure your spelling and grammar are correct . Slides is equipped with a spellchecker. If you misspell something, it underlines the error with a squiggly line and prompts you to make a change.
This should be on by default, but you can make sure in Tools > Spelling > Underline Errors.

To see spelling corrections and suggestions, right-click the word with the line underneath. Alternatively, press Ctrl+Alt+X (Windows) or Command+Alt+X (Mac) to open the Spell Check and Grammar tool.

Along with a spellchecker, Google Slides comes loaded with a built-in dictionary and thesaurus. To use them, highlight a word, right-click it, and then click "Define [word]."
![Click "Define [word]."](https://static1.howtogeekimages.com/wordpress/wp-content/uploads/2018/12/x2018-12-01_09h28_56.png.pagespeed.gp+jp+jw+pj+ws+js+rj+rp+rw+ri+cp+md.ic.ffEHQWWNZF.png "slides in presentations")
While this should get you started, we have a deeper dive into Google’s spelling and grammar checker if you want more info.
Related: How to Check Your Spelling in Google Docs

One of the best features of Google Slides is its ability to generate a shareable link. Anyone you share the link with can view, suggest edits to, or directly edit the presentation. This eliminates the hassle of sending a file back and forth between collaborators. Each person has her own text entry cursor to use on her computer.
To do this, click the orange "Share" button in the file you want to share. Next, choose how and with whom you want to send a link to the file. You can type email addresses or click "Get Shareable Link" in the top corner to hand out the invitation yourself.

From the drop-down menu, you can select one of these options for what other users can do:
- Off: Sharing is disabled. If you’ve previously shared a link with others, it will no longer work and revokes any permissions they once had.
- Anyone with the link can edit: Gives the shared users full read/write access. They still can’t delete it from your Drive, though---this is just for the contents of the file.
- Anyone with the link can comment: Allows shared users to leave comments which is handy for team projects.
- Anyone with the link can view : Shared users can view the file, but can’t edit it in any way. This is the default action when you share a file, and it's the best option if you’re trying to share a file for download.
You can do a lot more with these shareable links, as they also work with other Drive files and on mobile. For a deeper look at how links work and how to generate them, check out our post .
Related: How to Create Shareable Download Links for Files on Google Drive

When you share documents with others, it’s difficult to keep track of all the small changes that happen if you’re not present. For that, there’s revision history . Google keeps track of all the changes that occur in a document and groups them into periods to reduce clutter. You can even revert a file to any of the previous versions listed in the history with a click of your mouse.
You can view a list of all recent changes by clicking File > Version History > See Version History. Alternatively, you can press Ctrl+Alt+Shift+H (Command+Option+Shift+H on Mac).

Related: How to See Recent Changes to Your Google Docs, Sheets, or Slides File
You can also share a link to a specific slide in your presentation with a friend or coworker, without having to mention which one you're referencing. When someone clicks the link and the presentation loads, it jumps directly to the slide you're referencing. You do have to enable file sharing before you can link to a specific slide in your presentation, though.
Because each slide has a unique URL, all you have to do to link to one is click it in the left pane, and then copy the URL from the address bar.

Google Slides also has a character insertion tool. This allows you to insert special characters into your presentation without having to remember any Alt-codes. There are tons of symbols, characters, languages, and so much more. So, whether you want an arrow, different language scripts, or if you just want a few silly emojis to spruce up your presentation, Google Slides makes it easy to include them.
To open the character insertion tool, click "Insert," and then click "Special Characters."

From here, you can manually search for specific characters with the drop-down menus.

Use the search bar to find a specific character or emoji.

You can also use your drawing skills to search.

Related: How to Insert Symbols into Google Docs and Slides
What happens if you need to access Google Slides but don’t have an internet connection? Although Slides is a web-based product, that doesn’t mean you can’t use it offline . Any changes you make to the file offline will update the next time you connect to the internet. First, download the extension for Chrome.
To enable a presentation for offline use, go to the Google Slides’ homepage and, in the top-left corner, click the Hamburger menu > Settings. Once here, toggle "Offline" to the On position, and then click "OK."

To save storage space on your local machine, Google only downloads and makes the most recently accessed files available offline. To manually enable a file, click the three dots icon, and then toggle "Available Offline" to On.

Related: How to Use Google Docs Offline
Google Slides is a powerful, feature-rich alternative to Microsoft Office's PowerPoint. It's also completely free to use with an internet connection and a Google Account, making it a legitimate competitor for Microsoft.
- Google Slides
- PRO Courses Guides New Tech Help Pro Expert Videos About wikiHow Pro Upgrade Sign In
- EDIT Edit this Article
- EXPLORE Tech Help Pro About Us Random Article Quizzes Request a New Article Community Dashboard This Or That Game Popular Categories Arts and Entertainment Artwork Books Movies Computers and Electronics Computers Phone Skills Technology Hacks Health Men's Health Mental Health Women's Health Relationships Dating Love Relationship Issues Hobbies and Crafts Crafts Drawing Games Education & Communication Communication Skills Personal Development Studying Personal Care and Style Fashion Hair Care Personal Hygiene Youth Personal Care School Stuff Dating All Categories Arts and Entertainment Finance and Business Home and Garden Relationship Quizzes Cars & Other Vehicles Food and Entertaining Personal Care and Style Sports and Fitness Computers and Electronics Health Pets and Animals Travel Education & Communication Hobbies and Crafts Philosophy and Religion Work World Family Life Holidays and Traditions Relationships Youth
- Browse Articles
- Learn Something New
- Quizzes Hot
- Happiness Hub
- This Or That Game
- Train Your Brain
- Explore More
- Support wikiHow
- About wikiHow
- Log in / Sign up
- Computers and Electronics
- Presentation Software
- PowerPoint Presentations
Simple Steps to Make a PowerPoint Presentation
Last Updated: April 28, 2024 Fact Checked
Creating a New PowerPoint
Creating the title slide, adding a new slide, adding content to slides, adding transitions, testing and saving your presentation.
This article was co-authored by wikiHow staff writer, Darlene Antonelli, MA . Darlene Antonelli is a Technology Writer and Editor for wikiHow. Darlene has experience teaching college courses, writing technology-related articles, and working hands-on in the technology field. She earned an MA in Writing from Rowan University in 2012 and wrote her thesis on online communities and the personalities curated in such communities. This article has been fact-checked, ensuring the accuracy of any cited facts and confirming the authority of its sources. This article has been viewed 4,333,897 times. Learn more...
Do you want to have your data in a slide show? If you have Microsoft 365, you can use PowerPoint! PowerPoint is a program that's part of the Microsoft Office suite (which you have to pay for) and is available for both Windows and Mac computers. This wikiHow teaches you how to create your own Microsoft PowerPoint presentation on a computer.
How to Make a PowerPoint Presentation
- Open the PowerPoint app, select a template and theme, then like “Create.”
- Click the text box to add your title and subtitle to create your title slide.
- Click the “Insert” tab, then “New Slide” to add another slide.
- Choose the type of slide you want to add, then add text and pictures.
- Rearrange slides by dragging them up or down in the preview box.
Things You Should Know
- Templates make it easy to create vibrant presentations no matter your skill level.
- When adding photos, you can adjust their sizes by clicking and dragging in or out from their corners.
- You can add animated transitions between slides or to individual elements like bullet points and blocks of text.

- If you don't have a Microsoft Office 365 subscription, you can use the website instead of the desktop app. Go to https://powerpoint.office.com/ to use the website version.
- You can also use the mobile app to make presentations, though it's easier to do this on a computer, which has a larger screen, a mouse, and a keyboard.

- If you don't want to use a template, just click the Blank option in the upper-left side of the page and skip to the next part.

- Skip this step if your selected template has no themes available.

- If you're creating a PowerPoint presentation for which an elaborate title slide has been requested, ignore this step.

- You can change the font and size of text used from the Home tab that's in the orange ribbon at the top of the window.

- You can also just leave this box blank if you like.

- You can also click and drag in or out one of a text box's corners to shrink or enlarge the text box.

- On a Mac, you'll click the Home tab instead. [1] X Research source

- Clicking the white slide-shaped box above this option will result in a new text slide being inserted.

- Title Slide
- Title and Content
- Section Header
- Two Content
- Content with Caption
- Picture with Caption

- Naturally, the title slide should be the first slide in your presentation, meaning that it should be the top slide in the left-hand column.

- Skip this step and the next two steps if your selected slide uses a template that doesn't have text boxes in it.

- Text boxes in PowerPoint will automatically format the bulk of your text for you (e.g., adding bullet points) based on the context of the content itself.
- You can add notes that the Presentation will not include (but you'll still be able to see them on your screen) by clicking Notes at the bottom of the slide.

- You can change the font of the selected text by clicking the current font's name and then clicking your preferred font.
- If you want to change the size of the text, click the numbered drop-down box and then click a larger or smaller number based on whether you want to enlarge or shrink the text.
- You can also change the color, bolding, italicization, underlining, and so on from here.

- Photos in particular can be enlarged or shrunk by clicking and dragging out or in one of their corners.

- Remember to keep slides uncluttered and relatively free of distractions. It's best to keep the amount of text per slide to around 33 words or less. [2] X Research source

- Slide content will animate in the order in which you assign transitions. For example, if you animate a photo on the slide and then animate the title, the photo will appear before the title.
- Make your slideshow progress automatically by setting the speed of every transition to align with your speech as well as setting each slide to Advance . [3] X Trustworthy Source Microsoft Support Technical support and product information from Microsoft. Go to source

- If you need to exit the presentation, press Esc .

- Windows - Click File , click Save , double-click This PC , select a save location, enter a name for your presentation, and click Save .
- Mac - Click File , click Save As... , enter the presentation's name in the "Save As" field, select a save location by clicking the "Where" box and clicking a folder, and click Save .
Community Q&A
- If you save your PowerPoint presentation in .pps format instead of the default .ppt format, double-clicking your PowerPoint presentation file will prompt the presentation to open directly into the slideshow view. Thanks Helpful 6 Not Helpful 0
- If you don't have Microsoft Office, you can still use Apple's Keynote program or Google Slides to create a PowerPoint presentation. Thanks Helpful 0 Not Helpful 0

- Your PowerPoint presentation (or some features in it) may not open in significantly older versions of PowerPoint. Thanks Helpful 1 Not Helpful 2
- Great PowerPoint presentations avoid placing too much text on one slide. Thanks Helpful 0 Not Helpful 0
You Might Also Like

- ↑ https://onedrive.live.com/view.aspx?resid=DBDCE00C929AA5D8!252&ithint=file%2cpptx&app=PowerPoint&authkey=!AH4O9NxcbehqzIg
- ↑ https://www.virtualsalt.com/powerpoint.htm
- ↑ https://support.microsoft.com/en-us/office/set-the-timing-and-speed-of-a-transition-c3c3c66f-4cca-4821-b8b9-7de0f3f6ead1#:~:text=To%20make%20the%20slide%20advance,effect%20on%20the%20slide%20finishes .
About This Article

- Send fan mail to authors
Reader Success Stories
Artis Holland
Sep 22, 2016
Is this article up to date?
Oct 18, 2016
Jul 23, 2016
Margery Niyi
Sep 25, 2017
Jul 21, 2016

Featured Articles

Trending Articles

Watch Articles

- Terms of Use
- Privacy Policy
- Do Not Sell or Share My Info
- Not Selling Info
wikiHow Tech Help Pro:
Level up your tech skills and stay ahead of the curve

- SUGGESTED TOPICS
- The Magazine
- Newsletters
- Managing Yourself
- Managing Teams
- Work-life Balance
- The Big Idea
- Data & Visuals
- Reading Lists
- Case Selections
- HBR Learning
- Topic Feeds
- Account Settings
- Email Preferences
How to Make a “Good” Presentation “Great”
- Guy Kawasaki

Remember: Less is more.
A strong presentation is so much more than information pasted onto a series of slides with fancy backgrounds. Whether you’re pitching an idea, reporting market research, or sharing something else, a great presentation can give you a competitive advantage, and be a powerful tool when aiming to persuade, educate, or inspire others. Here are some unique elements that make a presentation stand out.
- Fonts: Sans Serif fonts such as Helvetica or Arial are preferred for their clean lines, which make them easy to digest at various sizes and distances. Limit the number of font styles to two: one for headings and another for body text, to avoid visual confusion or distractions.
- Colors: Colors can evoke emotions and highlight critical points, but their overuse can lead to a cluttered and confusing presentation. A limited palette of two to three main colors, complemented by a simple background, can help you draw attention to key elements without overwhelming the audience.
- Pictures: Pictures can communicate complex ideas quickly and memorably but choosing the right images is key. Images or pictures should be big (perhaps 20-25% of the page), bold, and have a clear purpose that complements the slide’s text.
- Layout: Don’t overcrowd your slides with too much information. When in doubt, adhere to the principle of simplicity, and aim for a clean and uncluttered layout with plenty of white space around text and images. Think phrases and bullets, not sentences.
As an intern or early career professional, chances are that you’ll be tasked with making or giving a presentation in the near future. Whether you’re pitching an idea, reporting market research, or sharing something else, a great presentation can give you a competitive advantage, and be a powerful tool when aiming to persuade, educate, or inspire others.
- Guy Kawasaki is the chief evangelist at Canva and was the former chief evangelist at Apple. Guy is the author of 16 books including Think Remarkable : 9 Paths to Transform Your Life and Make a Difference.
Partner Center
Critical PowerPoint Shortcuts – Claim Your FREE Training Module and Get Your Time Back!
How to Make a PowerPoint Presentation (Step-by-Step)
- PowerPoint Tutorials
- Presentation Design
- January 22, 2024
In this beginner’s guide, you will learn step-by-step how to make a PowerPoint presentation from scratch.
While PowerPoint is designed to be intuitive and accessible, it can be overwhelming if you’ve never gotten any training on it before. As you progress through this guide, you’ll will learn how to move from blank slides to PowerPoint slides that look like these.

Table of Contents
Additionally, as you create your presentation, you’ll also learn tricks for working more efficiently in PowerPoint, including how to:
- Change the slide order
- Reset your layout
- Change the slide dimensions
- Use PowerPoint Designer
- Format text
- Format objects
- Play a presentation (slide show)
With this knowledge under your belt, you’ll be ready to start creating PowerPoint presentations. Moreover, you’ll have taken your skills from beginner to proficient in no time at all. I will also include links to more advanced PowerPoint topics.
Ready to start learning how to make a PowerPoint presentation?
Take your PPT skills to the next level
Start with a blank presentation.
Note: Before you open PowerPoint and start creating your presentation, make sure you’ve collected your thoughts. If you’re going to make your slides compelling, you need to spend some time brainstorming.
For help with this, see our article with tips for nailing your business presentation here .
The first thing you’ll need to do is to open PowerPoint. When you do, you are shown the Start Menu , with the Home tab open.
This is where you can choose either a blank theme (1) or a pre-built theme (2). You can also choose to open an existing presentation (3).
For now, go ahead and click on the Blank Presentation (1) thumbnail.

Doing so launches a brand new and blank presentation for you to work with. Before you start adding content to your presentation, let’s first familiarize ourselves with the PowerPoint interface.
The PowerPoint interface

Here is how the program is laid out:
- The Application Header
- The Ribbon (including the Ribbon tabs)
- The Quick Access Toolbar (either above or below the Ribbon)
- The Slides Pane (slide thumbnails)
The Slide Area
The notes pane.
- The Status Bar (including the View Buttons)
Each one of these areas has options for viewing certain parts of the PowerPoint environment and formatting your presentation.
Below are the important things to know about certain elements of the PowerPoint interface.
The PowerPoint Ribbon

The Ribbon is contextual. That means that it will adapt to what you’re doing in the program.
For example, the Font, Paragraph and Drawing options are greyed out until you select something that has text in it, as in the example below (A).

Furthermore, if you start manipulating certain objects, the Ribbon will display additional tabs, as seen above (B), with more commands and features to help you work with those objects. The following objects have their own additional tabs in the Ribbon which are hidden until you select them:
- Online Pictures
- Screenshots
- Screen Recording
The Slides Pane

This is where you can preview and rearrange all the slides in your presentation.
Right-clicking on a slide in the pane gives you additional options on the slide level that you won’t find on the Ribbon, such as Duplicate Slide , Delete Slide , and Hide Slide .

In addition, you can add sections to your presentation by right-clicking anywhere in this Pane and selecting Add Section . Sections are extremely helpful in large presentations, as they allow you to organize your slides into chunks that you can then rearrange, print or display differently from other slides.

The Slide Area (A) is where you will build out your slides. Anything within the bounds of this area will be visible when you present or print your presentation.
Anything outside of this area (B) will be hidden from view. This means that you can place things here, such as instructions for each slide, without worrying about them being shown to your audience.

The Notes Pane is the space beneath the Slide Area where you can type in the speaker notes for each slide. It’s designed as a fast way to add and edit your slides’ talking points.
To expand your knowledge and learn more about adding, printing, and exporting your PowerPoint speaker notes, read our guide here .
Your speaker notes are visible when you print your slides using the Notes Pages option and when you use the Presenter View . To expand your knowledge and learn the ins and outs of using the Presenter View , read our guide here .

You can resize the Notes Pane by clicking on its edge and dragging it up or down (A). You can also minimize or reopen it by clicking on the Notes button in the Status Bar (B).
Note: Not all text formatting displays in the Notes Pane, even though it will show up when printing your speaker notes. To learn more about printing PowerPoint with notes, read our guide here .
Now that you have a basic grasp of the PowerPoint interface at your disposal, it’s time to make your presentation.
Adding Content to Your PowerPoint Presentation
Notice that in the Slide Area , there are two rectangles with dotted outlines. These are called Placeholders and they’re set on the template in the Slide Master View .
To expand your knowledge and learn how to create a PowerPoint template of your own (which is no small task), read our guide here .

As the prompt text suggests, you can click into each placeholder and start typing text. These types of placeholder prompts are customizable too. That means that if you are using a company template, it might say something different, but the functionality is the same.

Note: For the purposes of this example, I will create a presentation based on the content in the Starbucks 2018 Global Social Impact Report, which is available to the public on their website.
If you type in more text than there is room for, PowerPoint will automatically reduce its font size. You can stop this behavior by clicking on the Autofit Options icon to the left of the placeholder and selecting Stop Fitting Text to this Placeholder .
Next, you can make formatting adjustments to your text by selecting the commands in the Font area and the Paragraph area of the Home tab of the Ribbon.

The Reset Command: If you make any changes to your title and decide you want to go back to how it was originally, you can use the Reset button up in the Home tab .

Insert More Slides into Your Presentation
Now that you have your title slide filled in, it’s time to add more slides. To do that, simply go up to the Home tab and click on New Slide . This inserts a new slide in your presentation right after the one you were on.

You can alternatively hit Ctrl+M on your keyboard to insert a new blank slide in PowerPoint. To learn more about this shortcut, see my guide on using Ctrl+M in PowerPoint .
Instead of clicking the New Slide command, you can also open the New Slide dropdown to see all the slide layouts in your PowerPoint template. Depending on who created your template, your layouts in this dropdown can be radically different.

If you insert a layout and later want to change it to a different layout, you can use the Layout dropdown instead of the New Slide dropdown.
After inserting a few different slide layouts, your presentation might look like the following picture. Don’t worry that it looks blank, next we will start adding content to your presentation.

If you want to follow along exactly with me, your five slides should be as follows:
- Title Slide
- Title and Content
- Section Header
- Two Content
- Picture with Caption
Adding Content to Your Slides
Now let’s go into each slide and start adding our content. You’ll notice some new types of placeholders.

On slide 2 we have a Content Placeholder , which allows you to add any kind of content. That includes:
- A SmartArt graphic,
- A 3D object,
- A picture from the web,
- Or an icon.
To insert text, simply type it in or hit Ctrl+C to Copy and Ctrl+V to Paste from elsewhere. To insert any of the other objects, click on the appropriate icon and follow the steps to insert it.
For my example, I’ll simply type in some text as you can see in the picture below.

Slides 3 and 4 only have text placeholders, so I’ll go ahead and add in my text into each one.

On slide 5 we have a Picture Placeholder . That means that the only elements that can go into it are:
- A picture from the web

To insert a picture into the picture placeholder, simply:
- Click on the Picture icon
- Find a picture on your computer and select it
- Click on Insert
Alternatively, if you already have a picture open somewhere else, you can select the placeholder and paste in (shortcut: Ctrl+V ) the picture. You can also drag the picture in from a file explorer window.

If you do not like the background of the picture you inserted onto your slide, you can remove the background here in PowerPoint. To see how to do this, read my guide here .
Placeholders aren’t the only way to add content to your slides. At any point, you can use the Insert tab to add elements to your slides.
You can use either the Title Only or the Blank slide layout to create slides for content that’s different. For example, a three-layout content slide, or a single picture divider slide, as shown below.

In the first example above, I’ve inserted 6 text boxes, 3 icons, and 3 circles to create this layout. In the second example, I’ve inserted a full-sized picture and then 2 shapes and 2 text boxes.
The Reset Command: Because these slides are built with shapes and text boxes (and not placeholders), hitting the Reset button up in the Home tab won’t do anything.
That is a good thing if you don’t want your layouts to adjust. However, it does mean that it falls on you to make sure everything is aligned and positioned correctly.
For more on how to add and manipulate the different objects in PowerPoint, check out our step-by-step articles here:
- Using graphics in PowerPoint
- Inserting icons onto slides
- Adding pictures to your PowerPoint
- How to embed a video in PowerPoint
- How to add music to your presentation
Using Designer to generate more layouts ideas
If you have Office 365, your version of PowerPoint comes with a new feature called Designer (or Design Ideas). This is a feature that generates slide layout ideas for you. The coolest thing about this feature is that it uses the content you already have.
To use Designer , simply navigate to the Design tab in your Ribbon, and click on Design Ideas .

NOTE: If the PowerPoint Designer is not working for you (it is grey out), see my troubleshooting guide for Designer .
Change the Overall Design (optional)
When you make a PowerPoint presentation, you’ll want to think about the overall design. Now that you have some content in your presentation, you can use the Design tab to change the look and feel of your slides.
For additional help thinking through the design of your presentation, read my guide here .
A. Picking your PowerPoint slide size
If you have PowerPoint 2013 or later, when you create a blank document in PowerPoint, you automatically start with a widescreen layout with a 16:9 ratio. These dimensions are suitable for most presentations as they match the screens of most computers and projectors.
However, you do have the option to change the dimensions.
For example, your presentation might not be presented, but instead converted into a PDF or printed and distributed. In that case, you can easily switch to the standard dimensions with a 4:3 ratio by selecting from the dropdown (A).
You can also choose a custom slide size or change the slide orientation from landscape to portrait in the Custom Slide Size dialog box (B).

To learn all about the different PowerPoint slide sizes, and some of the issues you will face when changing the slide size of a non-blank presentation, read my guide here .
B. Selecting a PowerPoint theme
The next thing you can do is change the theme of your presentation to a pre-built one. For a detailed explanation of what a PowerPoint theme is, and how to best use it, read my article here .
In the beginning of this tutorial, we started with a blank presentation, which uses the default Office theme as you can see in the picture below.

That gives you the most flexibility because it has a blank background and quite simple layouts that work for most presentations. However, it also means that it’s your responsibility to enhance the design.
If you’re comfortable with this, you can stay with the default theme or create your own custom theme ( read my guide here ). But if you would rather not have to think about design, then you can choose a pre-designed theme.
Microsoft provides 46 other pre-built themes, which include slide layouts, color variants and palettes, and fonts. Each one varies quite significantly, so make sure you look through them carefully.
To select a different theme, go to the Design tab in the Ribbon, and click on the dropdown arrow in the Themes section .

For this tutorial, let’s select the Frame theme and then choose the third Variant in the theme. Doing so changes the layout, colors, and fonts of your presentation.

Note: The theme dropdown area is also where you can import or save custom themes. To see my favorite places to find professional PowerPoint templates and themes (and recommendations for why I like them), read my guide here .
C. How to change a slide background in PowerPoint
The next thing to decide is how you want your background to look for the entire presentation. In the Variants area, you can see four background options.

For this example, we want our presentation to have a dark background, so let’s select Style 3. When you do so, you’ll notice that:
- The background color automatically changes across all slides
- The color of the text on most of the slides automatically changes to white so that it’s visible on the dark background
- The colors of the objects on slides #6 and #7 also adjust, in a way we may not want (we’ll likely have to make some manual adjustments to these slides)

Note: If you want to change the slide background for just that one slide, don’t left-click the style. Instead, right-click it and select Apply to Selected Slides .
After you change the background for your entire presentation, you can easily adjust the background for an individual slide.

Inside the Format Background pane, you can see you have the following options:
- Gradient fill
- Picture or texture fill
- Pattern fill
- Hide background
You can explore these options to find the PowerPoint background that best fits your presentation.
D. How to change your color palette in PowerPoint
Another thing you may want to adjust in your presentation, is the color scheme. In the picture below you can see the Theme Colors we are currently using for this presentation.

Each PowerPoint theme comes with its own color palette. By default, the Office theme includes the Office color palette. This affects the colors you are presented with when you format any element within your presentation (text, shapes, SmartArt, etc.).

The good news is that the colors here are easy to change. To switch color palettes, simply:
- Go to the Design tab in the Ribbon
- In the Variants area, click on the dropdown arrow and select Colors
- Select the color palette (or theme colors) you want
You can choose among the pre-built color palettes from Office, or you can customize them to create your own.
As you build your presentation, make sure you use the colors from your theme to format objects. That way, changing the color palette adjusts all the colors in your presentation automatically.
E. How to change your fonts in PowerPoint
Just as we changed the color palette, you can do the same for the fonts.

Each PowerPoint theme comes with its own font combination. By default, the Office theme includes the Office font pairing. This affects the fonts that are automatically assigned to all text in your presentation.

The good news is that the font pairings are easy to change. To switch your Theme Fonts, simply:
- Go to the Design tab in the Ribbon
- Click on the dropdown arrow in the Variants area
- Select Fonts
- Select the font pairing you want
You can choose among the pre-built fonts from Office, or you can customize them to create your own.
If you are working with PowerPoint presentations on both Mac and PC computers, make sure you choose a safe PowerPoint font. To see a list of the safest PowerPoint fonts, read our guide here .
If you receive a PowerPoint presentation and the wrong fonts were used, you can use the Replace Fonts dialog box to change the fonts across your entire presentation. For details, read our guide here .
Adding Animations & Transitions (optional)
The final step to make a PowerPoint presentation compelling, is to consider using animations and transitions. These are by no means necessary to a good presentation, but they may be helpful in your situation.
A. Adding PowerPoint animations
PowerPoint has an incredibly robust animations engine designed to power your creativity. That being said, it’s also easy to get started with basic animations.
Animations are movements that you can apply to individual objects on your slide.

To add a PowerPoint animation to an element of your slide, simply:
- Select the element
- Go to the Animations tab in the Ribbon
- Click on the dropdown arrow to view your options
- Select the animation you want
You can add animations to multiple objects at one time by selecting them all first and then applying the animation.
B. How to preview a PowerPoint animation

There are three ways to preview a PowerPoint animation:
- Click on the Preview button in the Animations tab
- Click on the little star next to the slide
- Play the slide in Slide Show Mode
To learn other ways to run your slide show, see our guide on presenting a PowerPoint slide show with shortcuts .
To adjust the settings of your animations, explore the options in the Effect Options , Advanced Animation and the Timing areas of the Animation tab .

Note: To see how to make objects appear and disappear in your slides by clicking a button, read our guide here .
C. How to manage your animations in PowerPoint

The best way to manage lots of animations on your slide is with the Animation Pane . To open it, simply:
- Navigate to the Animations tab
- Select the Animation Pane
Inside the Animation Pane, you’ll see all of the different animations that have been applied to objects on your slide, with their numbers marked as pictured above.
Note: To see examples of PowerPoint animations that can use in PowerPoint, see our list of PowerPoint animation tutorials here .
D. How to add transitions to your PowerPoint presentation
PowerPoint has an incredibly robust transition engine so that you can dictate how your slides change from one to the other. It is also extremely easy to add transitions to your slides.
In PowerPoint, transitions are the movements (or effects) you see as you move between two slides.

To add a transition to a PowerPoint slide, simply:
- Select the slide
- Go to the Transitions tab in the Ribbon
- In the Transitions to This Slide area, click on the dropdown arrow to view your options
- Select the transition you want
To adjust the settings of the transition, explore the options in the Timing area of the Transitions tab.
You can also add the same transition to multiple slides. To do that, select them in the Slides Pane and apply the transition.
E. How to preview a transition in PowerPoint

There are three ways to preview your PowerPoint transitions (just like your animations):
- Click on the Preview button in the Transitions tab
- Click on the little star beneath the slide number in the thumbnail view
Note: In 2016, PowerPoint added a cool new transition, called Morph. It operates a bit differently from other transitions. For a detailed tutorial on how to use the cool Morph transition, see our step-by-step article here .
Save Your PowerPoint Presentation
After you’ve built your presentation and made all the adjustments to your slides, you’ll want to save your presentation. YOu can do this several different ways.

To save a PowerPoint presentation using your Ribbon, simply:
- Navigate to the File tab
- Select Save As on the left
- Choose where you want to save your presentation
- Name your presentation and/or adjust your file type settings
- Click Save
You can alternatively use the Ctrl+S keyboard shortcut to save your presentation. I recommend using this shortcut frequently as you build your presentation to make sure you don’t lose any of your work.

This is the standard way to save a presentation. However, there may be a situation where you want to save your presentation as a different file type.
To learn how to save your presentation as a PDF, see our guide on converting PowerPoint to a PDF .
How to save your PowerPoint presentation as a template
Once you’ve created a presentation that you like, you may want to turn it into a template. The easiest – but not technically correct – way, is to simply create a copy of your current presentation and then change the content.
But be careful! A PowerPoint template is a special type of document and it has its own parameters and behaviors.
If you’re interested in learning about how to create your own PowerPoint template from scratch, see our guide on how to create a PowerPoint template .
Printing Your PowerPoint Presentation
After finishing your PowerPoint presentation, you may want to print it out on paper. Printing your slides is relatively easy.

To open the Print dialog box, you can either:
- Hit Ctrl+P on your keyboard
- Or go to the Ribbon and click on File and then Print

Inside the Print dialog box, you can choose from the various printing settings:
- Printer: Select a printer to use (or print to PDF or OneNote)
- Slides: Choose which slides you want to print
- Layout: Determine how many slides you want per page (this is where you can print the notes, outline, and handouts)
- Collated or uncollated (learn what collated printing means here )
- Color: Choose to print in color, grayscale or black & white
There are many more options for printing your PowerPoint presentations. Here are links to more in-depth articles:
- How to print multiple slides per page
- How to print your speaker notes in PowerPoint
- How to save PowerPoint as a picture presentation
So that’s how to create a PowerPoint presentation if you are brand new to it. We’ve also included a ton of links to helpful resources to boost your PowerPoint skills further.
When you are creating your presentation, it is critical to first focus on the content (what you are trying to say) before getting lost inserting and playing with elements. The clearer you are on what you want to present, the easier it will be to build it out in PowerPoint.
If you enjoyed this article, you can learn more about our PowerPoint training courses and other presentation resources by visiting us here .
🔒 Unlock the PowerPoint Shortcuts Trusted by Industry Leaders KKR, American Express, HSBC, and More!
Join over 114,880 professionals from diverse fields including consulting, investment banking, advertising, marketing, sales, and business development who have supercharged their PowerPoint game with our proven methods.
✅ Customize compelling presentations effortlessly.
✅ Master time-saving techniques for faster deck creation.
✅ Boost your career prospects with top-notch PowerPoint skills.
Get FREE access to the Critical PowerPoint Shortcuts module of our premium training course by entering your name and email below.
DISCLAIMER: PC Users Only!
We respect your privacy and will keep your info safe and confidential.
About The Author

Popular Tutorials
- How to Strikethrough Text (l̶i̶k̶e̶ ̶t̶h̶i̶s̶) in Word, Excel & PowerPoint
- How to Make Animated Fireworks in PowerPoint (Step-by-Step)
- Strikethrough Shortcut (l̶i̶k̶e̶ ̶t̶h̶i̶s̶) for Word, Excel & PowerPoint
- How to Create a Flash Card Memory Game in PowerPoint (Like Jeopardy)
- Keyboard Shortcuts Not Working: Solved
PowerPoint Tutorial Categories
- Strategies & Opinions
- Shortcuts & Hacks
- Pictures, Icons, Videos, Etc.
- New Features
- Miscellaneous
- Charts & Data Viz
We help busy professionals save hours and gain peace of mind, with corporate workshops, self-paced courses and tutorials for PowerPoint and Word.
Work With Us
- Corporate Training
- Presentation & Template Design
- Courses & Downloads
- PowerPoint Articles
- Word Articles
- Productivity Resources
Find a Tutorial
- Free Training
- For Businesses
We help busy office workers save hours and gain peace of mind, with tips, training and tutorials for Microsoft PowerPoint and Word.
Master Critical PowerPoint Shortcuts – Secure Your FREE Training Module and Save Valuable Time!
⌛ Master time-saving expert techniques.
🔥 Create powerful presentations.
🚀 Propel your career to new heights.
We value your privacy – we keep your info safe.
Discover PowerPoint Hacks Loved by Industry Giants - KKR, AmEx, HSBC!
Over 114,880 professionals in finance, marketing and sales have revolutionized their PPT skills with our proven methods.
Gain FREE access to a full module of our premium PowerPoint training program – Get started today!
We hate spam too and promise to keep your information safe.
You are currently viewing a placeholder content from Facebook . To access the actual content, click the button below. Please note that doing so will share data with third-party providers.

Microsoft 365 Life Hacks > Presentations > How to Format Presentation Slides
How to Format Presentation Slides
Learn how to give your presentation slides a facelift so they captivate your audience.

Why is Presentation Design and Formatting Important?
A well-designed presentation can help you connect with your audience and gets your message across in an easily digestible manner. Great presentation design can impart a positive first impression and is more likely to draw in and engage an audience.
Pretend you’re attending a presentation and instead of formatted PowerPoint slides, each one is plain white with a lot of dark text that’s hard to read. And even though the background and text colors are the same, none of the text is lined up and multiple fonts are used. There are no transitions or title pages that help to differentiate between topics being discussed and you’re presented with slide after slide of confusing, jumbled text.

Tell your story with captivating presentations
Powerpoint empowers you to develop well-designed content across all your devices
Formatting slides in your presentation is what enhances the look of the slides and transforms them into something that complements the content and resonates with the audience.
What Else Should a Good Presentation Include?
While formatted slides can help to connect with the audience, a good presentation should also include:
- Well-written, concise content that clearly explains the problem that you’re trying to solve and the unique solution you’ve come up with.
- A great hook or emotionally compelling introduction.
- Visuals that support your message and aren’t too busy.
Most importantly, a good presentation should be efficient and engage with the audience. And that engagement can be found in the content as well as how the slides are formatted.
Tips for Creating & Formatting Presentation Slides
Before you start creating your PowerPoint presentation, make sure that your content is solid. Making an outline can help you keep information organized, clear, and concise before you put it into a presentation. The outline can also help you break down what information is shared on each slide to keep things from being overcrowded or wordy. Take a minute to consider your audience and the best ways to connect with them and present what you’re trying to share.
Once your content is finalized, you can get to work on creating and formatting your presentation slides.
How to Make a Slide
A PowerPoint presentation is sometimes known as a deck and is composed of different slides. When you’re putting your own deck together, you’ll certainly need to add slides and format them in different ways.
In order to make a new slide appear in your presentation, first select the slide that you’d like your new slide to follow. Then click Home and choose New Slide . From there, you can choose your desired layout , and start inputting content. The layout options in PowerPoint are great for keeping your text lined up and consistent through the deck. You can also rearrange, duplicate, and delete slides as necessary.
Formatting Your Presentation Slides
Once you’ve created your content or slides, it’s time to consider design and formatting. This is where you make choices about themes, templates, color schemes, and fonts.
If you don’t feel confident about your design abilities, you might want to try applying a template . This customizable option offers a variety of artistic skins that can give your deck a professional polish. There is even a range of downloadable templates available from Microsoft to suit any kind of presentation.
Don’t feel like you must use a template, though. Many users may prefer to use or create a theme to visually tie together their presentations. PowerPoint provides a variety of themes which include color schemes, backgrounds, fonts, and placeholder slides. In the Design tab, you can choose a theme that appeals to you or matches with your content. You can even try different color variations within the theme by selecting Variants . Each variant has built in options for colors, fonts, and background colors and styles that can help you format your slides and create a cohesive look throughout the deck.
There are a few things to keep in mind if you decide to eschew the suggestions made by PowerPoint:
- Consider the colors you’re using. There are definitely a few color combinations you should avoid .
- Choose fonts that are easy to read and make sure that your text isn’t too small to be read across a large room. You’ll also want to remember to keep the text on your slides relatively sparse, with no more than three bullet points per slide.
Using Visual Aids in Your Presentation
One way to break up the monotony of an all-text presentation is to use visual aids like charts, graphs, static images, gifs, and movies.
As with all other aspects of your deck, ensure that your visuals are easy to see and understand, and aren’t too wordy. Imagine trying to read a line graph with lots of muddy colors and small text from across a conference room. The goal of a visual aid is to make the presentation you’re giving more compelling and the information you’re sharing easier to understand.
Here are a few tips for adding visuals to your presentation:
- Make sure the images you use are of high quality and that they fit in your deck. They shouldn’t be distorted or pixelated, as this will distract from the content.
- All charts should be very easy to read and understand. If someone can’t immediately glean what information is presented, you may be trying to fit too much into a single chart.
- Don’t use more than one chart per slide unless it’s necessary. Keep it simple.
- If you’re including a brand or logo in your deck, make sure you’re adhering to that brand’s style guide .
A great way to get design ideas for slides in your presentation us to use the Designer feature in PowerPoint. It automatically generates design ideas for you to choose from based on the content of your slide. Designer detects when you’re using pictures, charts, and tables and gives you suggestions for arranging them on your slides in a cohesive layout that’s easy on the eyes. Designer can also help to format your lists and timelines into easy-to-read graphics and suggests relevant graphics to pair with keywords that it finds within your content.
Create a PowerPoint deck that stands out and resonates with your audience by formatting it in a professional manner. And don’t forget to prep for your presentation !
Get started with Microsoft 365
It’s the Office you know, plus the tools to help you work better together, so you can get more done—anytime, anywhere.
Topics in this article
More articles like this one.

How to introduce yourself in a presentation
Gain your audience’s attention at the onset of a presentation. Craft an impressionable introduction to establish tone, presentation topic, and more.

How to add citations to your presentation
Conduct research and appropriately credit work for your presentation. Understand the importance of citing sources and how to add them to your presentation.

How to work on a group presentation
Group presentations can go smoothly with these essential tips on how to deliver a compelling one.

How to create a sales presentation
Engage your audience and get them interested in your product with this guide to creating a sales presentation.
Everything you need to achieve more in less time
Get powerful productivity and security apps with Microsoft 365

Explore Other Categories
Top searches
Trending searches

welcome back to school
111 templates

65 templates

sunday school

stop bullying
11 templates

education technology
273 templates

ai technology
193 templates
Create your presentation Create personalized presentation content
Writing tone, number of slides, ai presentation maker.
When lack of inspiration or time constraints are something you’re worried about, it’s a good idea to seek help. Slidesgo comes to the rescue with its latest functionality—the AI presentation maker! With a few clicks, you’ll have wonderful slideshows that suit your own needs . And it’s totally free!

Generate presentations in minutes
We humans make the world move, but we need to sleep, rest and so on. What if there were someone available 24/7 for you? It’s time to get out of your comfort zone and ask the AI presentation maker to give you a hand. The possibilities are endless : you choose the topic, the tone and the style, and the AI will do the rest. Now we’re talking!
Customize your AI-generated presentation online
Alright, your robotic pal has generated a presentation for you. But, for the time being, AIs can’t read minds, so it’s likely that you’ll want to modify the slides. Please do! We didn’t forget about those time constraints you’re facing, so thanks to the editing tools provided by one of our sister projects —shoutouts to Wepik — you can make changes on the fly without resorting to other programs or software. Add text, choose your own colors, rearrange elements, it’s up to you! Oh, and since we are a big family, you’ll be able to access many resources from big names, that is, Freepik and Flaticon . That means having a lot of images and icons at your disposal!

How does it work?
Think of your topic.
First things first, you’ll be talking about something in particular, right? A business meeting, a new medical breakthrough, the weather, your favorite songs, a basketball game, a pink elephant you saw last Sunday—you name it. Just type it out and let the AI know what the topic is.
Choose your preferred style and tone
They say that variety is the spice of life. That’s why we let you choose between different design styles, including doodle, simple, abstract, geometric, and elegant . What about the tone? Several of them: fun, creative, casual, professional, and formal. Each one will give you something unique, so which way of impressing your audience will it be this time? Mix and match!
Make any desired changes
You’ve got freshly generated slides. Oh, you wish they were in a different color? That text box would look better if it were placed on the right side? Run the online editor and use the tools to have the slides exactly your way.
Download the final result for free
Yes, just as envisioned those slides deserve to be on your storage device at once! You can export the presentation in .pdf format and download it for free . Can’t wait to show it to your best friend because you think they will love it? Generate a shareable link!
What is an AI-generated presentation?
It’s exactly “what it says on the cover”. AIs, or artificial intelligences, are in constant evolution, and they are now able to generate presentations in a short time, based on inputs from the user. This technology allows you to get a satisfactory presentation much faster by doing a big chunk of the work.
Can I customize the presentation generated by the AI?
Of course! That’s the point! Slidesgo is all for customization since day one, so you’ll be able to make any changes to presentations generated by the AI. We humans are irreplaceable, after all! Thanks to the online editor, you can do whatever modifications you may need, without having to install any software. Colors, text, images, icons, placement, the final decision concerning all of the elements is up to you.
Can I add my own images?
Absolutely. That’s a basic function, and we made sure to have it available. Would it make sense to have a portfolio template generated by an AI without a single picture of your own work? In any case, we also offer the possibility of asking the AI to generate images for you via prompts. Additionally, you can also check out the integrated gallery of images from Freepik and use them. If making an impression is your goal, you’ll have an easy time!
Is this new functionality free? As in “free of charge”? Do you mean it?
Yes, it is, and we mean it. We even asked our buddies at Wepik, who are the ones hosting this AI presentation maker, and they told us “yup, it’s on the house”.
Are there more presentation designs available?
From time to time, we’ll be adding more designs. The cool thing is that you’ll have at your disposal a lot of content from Freepik and Flaticon when using the AI presentation maker. Oh, and just as a reminder, if you feel like you want to do things yourself and don’t want to rely on an AI, you’re on Slidesgo, the leading website when it comes to presentation templates. We have thousands of them, and counting!.
How can I download my presentation?
The easiest way is to click on “Download” to get your presentation in .pdf format. But there are other options! You can click on “Present” to enter the presenter view and start presenting right away! There’s also the “Share” option, which gives you a shareable link. This way, any friend, relative, colleague—anyone, really—will be able to access your presentation in a moment.
Discover more content
This is just the beginning! Slidesgo has thousands of customizable templates for Google Slides and PowerPoint. Our designers have created them with much care and love, and the variety of topics, themes and styles is, how to put it, immense! We also have a blog, in which we post articles for those who want to find inspiration or need to learn a bit more about Google Slides or PowerPoint. Do you have kids? We’ve got a section dedicated to printable coloring pages! Have a look around and make the most of our site!
From Ideas to Impactful Presentations
Free Templates & Infographics for PowerPoint and Google Slides

Island Paradise Template
Google Slides , POTX

Summer Radiance Template
Octagon Arrow Line Diagram
Google Slides , PPTX
Heptagon Arrow Line Diagram
Hexagon Arrow Line Diagram
Pentagon Arrow Line Diagram
Square Arrow Line Diagram
Triangular Arrow Line Diagram

Wooden Framed Chalkboard Template
Trending templates.
Independence Day (USA)
Sport Templates
Summer Templates
Ideas & Resources
Uncover a world of innovative ideas, creative insights, and design tips to enhance your PowerPoint and Google Slides presentations.

How to Convert Presentations from Google Slides to PowerPoint

Mastering Text Emphasis in Your Presentation: Tips and Techniques

2023 Presentation Design Trends

How to Ace Your Sales Presentation in 10 Steps
Presentationgo – 2,594 free google slides themes and powerpoint templates.
Comprehensive Collection
Explore 2,594 free templates and graphics for captivating presentations, with new content added daily.
Premium-Quality Designs
Expertly crafted graphics by designers and fine-tuned by seasoned presenters for maximum impact.
Effortless Customization
Fully editable graphics for seamless modification, tailored to your specific needs.
Absolutely Free
Experience hassle-free, 100% free downloads without the need for registration – access through a direct link instantly.
PresentationGO is your go-to source for an extensive and ever-expanding library of free templates tailored for PowerPoint and Google Slides . Our collection is rich in diversity, covering a wide spectrum of graphics specifically designed for presentations across various domains, ensuring you find exactly what you need for your next project.
Crafted with premium quality by skilled designers, our unique and exclusive designs are meticulously optimized for slide formats, guaranteeing to elevate the effectiveness of your presentations. With over 2,594 high-quality templates , PresentationGO offers a vast selection that includes themes and backgrounds, charts and diagrams, text and tables, timelines and planning, as well as graphics and metaphors and maps.
Our fully editable graphics and themes are designed for effortless customization , allowing you to tailor each template to meet your unique needs. Available in both standard and widescreen formats and optimized for light and dark backgrounds , our templates ensure your presentations are visually appealing and professional, without the need for additional adjustments.
In conclusion, PresentationGO provides an all-inclusive resource for Google Slides themes and PowerPoint templates , encompassing everything required to create an engaging, visually stunning presentation. Embark on exploring our remarkable collection today to discover the perfect elements that will make your presentation stand out.
Love our templates? Show your support with a coffee!
Thank you for fueling our creativity.
Charts & Diagrams
Text & Tables
Graphics & Metaphors
Timelines & Planning
Best-Ofs & Tips
Terms and Conditions
Privacy Statement
Cookie Policy
Digital Millennium Copyright Act (DMCA) Policy
© Copyright 2024 Ofeex | PRESENTATIONGO® is a registered trademark | All rights reserved.

To provide the best experiences, we and our partners use technologies like cookies to store and/or access device information. Consenting to these technologies will allow us and our partners to process personal data such as browsing behavior or unique IDs on this site and show (non-) personalized ads. Not consenting or withdrawing consent, may adversely affect certain features and functions.
Click below to consent to the above or make granular choices. Your choices will be applied to this site only. You can change your settings at any time, including withdrawing your consent, by using the toggles on the Cookie Policy, or by clicking on the manage consent button at the bottom of the screen.
Thank you for downloading this template!
Remember, you can use it for free but you have to attribute PresentationGO . For example, you can use the following text:
If you really like our free templates and want to thank/help us, you can:
Thank you for your support
Find the perfect PowerPoint presentation template
Bring your next presentation to life with customizable powerpoint design templates. whether you're wowing with stats via charts and graphs or putting your latest and greatest ideas on display, you'll find a powerpoint presentation template to make your ideas pop., presentations.
Help your data, insights, and recommendations make a statement with beautiful and easily customizable presentation templates.

Certificates
Celebrate accomplishments big and small with customizable certificate templates. From gift certificates to awards for finishing a course or training, find a template that highlights their accolades.
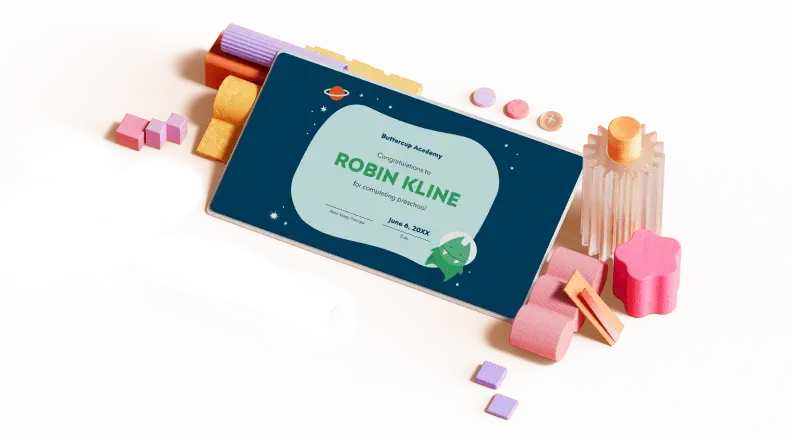
Boost visibility for your show, project, or business with easily customizable poster templates. Find templates for all your promotion needs and make them uniquely yours in a flash.
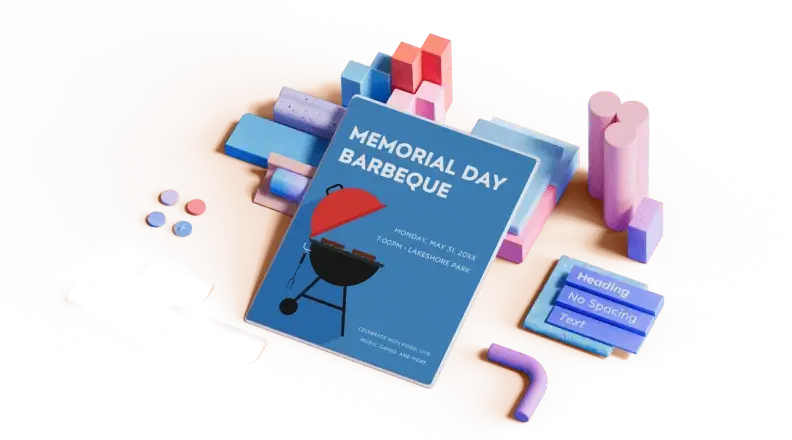
Keep track of whatever you need to in style. From personal planning to promotional calendars, find templates for every kind of project and aesthetic.

Infographics
Say more with less using helpful and easily customizable infographic templates. Add clarity to business presentations, school projects, and more with these helpful templates.
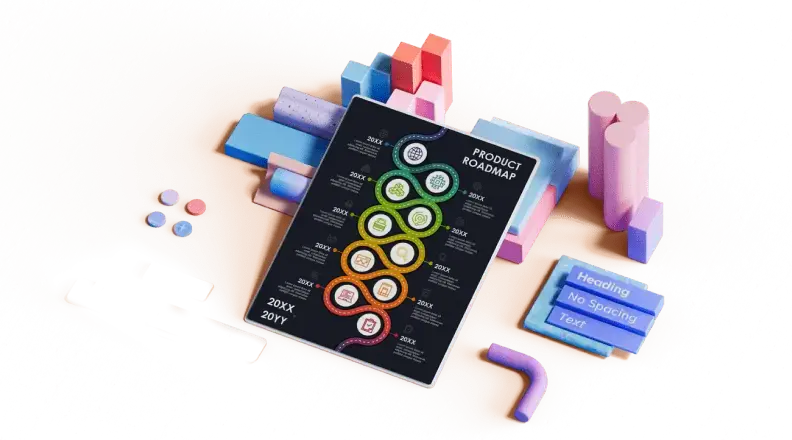
Start with the best PowerPoint templates

Elevate your storytelling
Tips, tricks, and insider advice from our business and design experts
A quick way to create beautiful, powerful PowerPoint presentations
Create captivating, informative content for PowerPoint in just a few minutes—no graphic design experience needed. Here's how:
1. Find the perfect PowerPoint template
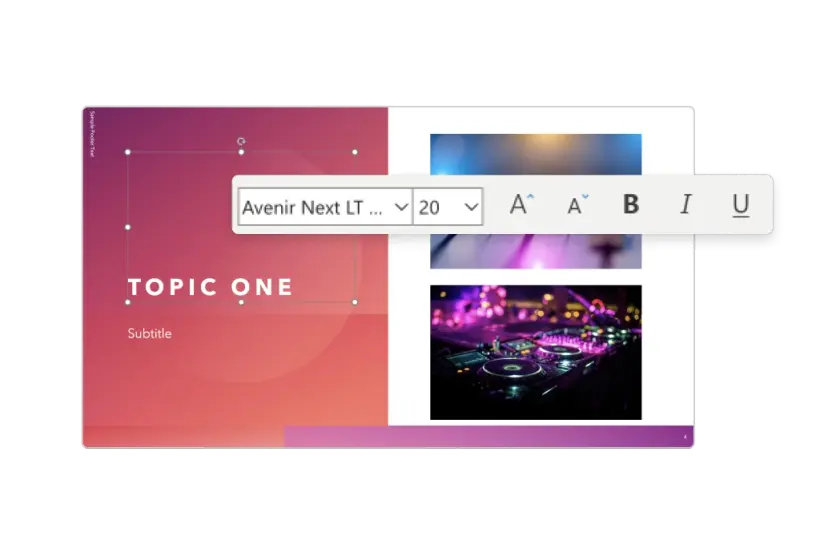
2. Customize your creation
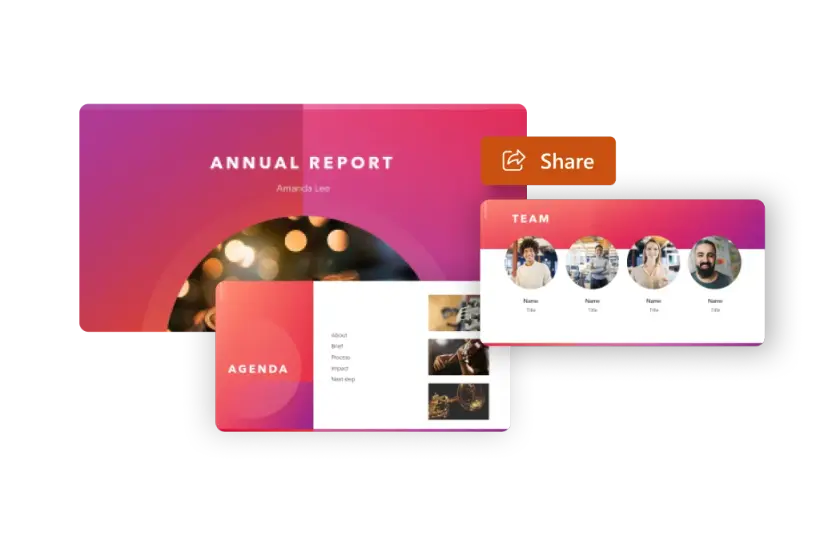
3. Show it off
Let's create a powerpoint design, frequently asked questions, where can i find slide templates and themes that i can customize.
To find customizable slide templates and themes, you can explore the business presentations templates or search by PowerPoint templates . Once you find a template that resonates with you, customize it by changing its color scheme, add in your own photos, and swap out the font.
How do I use pre-made PowerPoint templates?
After you've chosen a PowerPoint template to use, customize it. Explore [design tips] on how to customize a deck that resonates with your brand while putting emphasis on the topic at hand. Play with other design elements, like photo shapes, to make each slide unique.
How can I make or edit my own custom PowerPoint templates?
Start from scratch by creating your own PowerPoint template . Follow tips for designs and business presentations so that your unique template is cohesive and relevant to your brand. Incorporate your brand's color scheme and graphics so that all your slides aren't text only.
What kinds templates can I get online for PowerPoint?
You can get PowerPoint templates that have modern designs, animated ones, or even hand-drawn art in each slide. The color schemes range from bold to subtle. Each template's slides are also organized based on what you may want to include in your presentation . You can use the template as a starting point and customize its specific details from theme.
Popular categories

- Killer Prime Day Apple Deals Available Now!
- Are Solar Chargers Worth It?
How to Make a Slideshow on PowerPoint
Whether for work or private, use slideshows to get your message across
:max_bytes(150000):strip_icc():format(webp)/ColettaTeske-af57404a91b342578a97252b7dbd720f.jpg "slides in presentations")
- Central Washington University
Before You Begin
- Step-by-Step: Make a Slideshow on PowerPoint
- Play Music During the Slideshow
- Set up the Slideshow
- Add Timings to Each Slide
- Edit Timings on a Slide
- Create a Video Slideshow
- Save a Slideshow to a CD or Other Removeable Media
When you're ready to present your PowerPoint slides to others, look no further than PowerPoint's slideshow feature. Use this tool for all kinds of slides, but those containing photos work best for most viewers.
Instructions in this article apply to PowerPoint for Microsoft 365 , PowerPoint 2019, PowerPoint 2016, PowerPoint 2013, PowerPoint 2010, and PowerPoint for Mac.
Before you create slides for your slideshow presentation, decide how long to make the slideshow, how it should flow, and the pictures you’ll use.
- Length : A slideshow can be as long or as short as you need. The length of the slideshow should be appropriate for the topic and for your audience’s attention span.
- Outline : It’s always smart to start with an outline; it helps you visualize your slideshow. An outline can be as simple as the list of topics you want to cover.
- Pictures : Choose photos that are clear and tell a story.
With PowerPoint's Photo Album , select the pictures and PowerPoint creates the basic slideshow. Fill your slides with informative text and harmonizing background music, then turn your collection of slides into a self-running photo slideshow with music that can play as a video or be stored on a CD.
When you’re ready to make a photo slideshow with music, PowerPoint gets you up and running quickly. To get started, select Insert > Photo Album > New Photo Album .
Here’s how to add and format pictures for the slideshow using the Photo Album:
Add pictures
Select File/Disk and select the images you want in the picture slideshow.
Enhance photos
Place a checkmark next to the picture you want to enhance and change the orientation, contrast, and brightness. You’ll see the changes in the Preview window.
Add text boxes
To add a slide for text, select the image in the album list you want the text to follow and select New Text Box .
Rearrange slides
Place a checkmark next to the picture you want to move and select the Move Up or Move Down arrows.
Choose a picture layout
Select the Picture layout down arrow and choose how you want the pictures to appear in the slideshow.
Frame the pictures
Select the Frame shape down arrow and choose a frame style. You’ll see a preview in the Album Layout area. This option will not be selectable if the picture layout Fit to slide is enabled.
Select Create when you’re finished.
Your photo slideshow is created in a new file. Add text to the slides and change the look of each slide.
How to Play Music During the Slideshow
Play music in the background during your slideshow to offer an audio counterpoint to all the visuals. The background music starts automatically with the slideshow and plays during all the slides.
To add background music to your presentation, select Insert > Audio > Audio on My PC , choose a music file, then select OK .
The audio icon appears in the middle of the current slide. To move it, drag it to a different place on the slide. When the audio icon is selected, the Playback tab appears. Select Play in Background and make changes to the audio file . Here are some suggestions.
- Preview the music : Select Play to hear what the music will sound like during your slideshow.
- Shorten the duration : Select Trim Audio to remove parts of the beginning and end of the music file.
- Adjust the volume : Select Volume to make the background music louder or softer.
How to Set up the Slideshow
Once your slides are finished, it’s time to set up the slideshow. Start by deciding whether to show the slideshow in a window or full screen.
To set up the slideshow, select Slide Show > Set Up Slide Show and choose one of the following:
- Browsed by an individual (window) : Run the slideshow automatically and inside a window. This option works best when you save the slideshow to a CD.
- Browsed at a kiosk (full screen) : Run the slideshow automatically and at full-screen size. This option works best when you convert the slideshow to a video.
Select OK when you’re finished.
How to Add Timings to Each Slide in the Slideshow
Now it’s time to decide how long each slide will appear in the slideshow. To begin, select Slide Show > Rehearse Timings . The slideshow displays in full screen with a Recording toolbar and a timer.
While timing your presentation, use the Recording toolbar to advance through the presentation.
Select Next (arrow pointing to the right) to go to the next slide when the desired timing has been reached.
Select Pause to start and stop the timing.
Select Repeat to restart recording the time for the selected slide.
When you’re finished and have set the time for the last slide, close the Recording toolbar.
Select Yes to keep the recorded slide timings.
How to Edit Timings on a Slide
If you need to increase or decrease the time for your slideshow, change how long slides appear during the slideshow.
To change the timing for a slide:
Select View > Slide Sorter .
Select Transitions .
Select a slide.
In the Advance Slide After text box, enter how long the slide should appear in the slideshow before proceeding to the next slide, then press Enter .
The new timing applies to the slide.
How to Create a PowerPoint Video Slideshow
The easiest way to distribute and play your slideshow is in video format. This way, anyone can view your slideshow no matter what computer or device they use.
To convert a slideshow into a video:
Save the file.
Select File > Export .
Select Create a Video .
To force a smaller file size, select the Full HD drop-down list and choose a lower quality.
Select Create Video .
Select the destination folder and give the video a descriptive file name.
Select Save . It may take a few minutes to process the file and create the video.
How to Save a Slideshow to a CD or Other Removeable Media
To create a presentation that can be watched on any computer and can be stored on a CD or other removable media:
Select Package Presentation for CD > Package for CD .
Type a name for the CD.
Select Copy to Folder or Copy to CD and follow the on-screen directions.
When you’re finished, select Close .
Get the Latest Tech News Delivered Every Day
- The 8 Best Slideshow Apps of 2024
- How to Make an Image Background Transparent in PowerPoint
- How to Do a Voiceover on PowerPoint
- How to Create a 'Memories' Slideshow on iPhone
- Loop a PowerPoint Slide Show
- How to Use Copilot in Powerpoint
- Tips for Memorial PowerPoint Presentations
- How to Create Digital Photo Albums in PowerPoint
- How to Change a Black-and-White Picture to Color in PowerPoint
- How to Hide and Unhide a Slide in PowerPoint
- How to Add Music to PowerPoint
- Create a Wedding PowerPoint Presentation
- Adding Sounds, Music or Narration to PowerPoint Slide Shows
- How to Add Audio to PowerPoint
- How to Use Speaker Notes in PowerPoint
- How to Print PowerPoint Slides
IMAGES
VIDEO
COMMENTS
Bring your presentations to life in Google Slides with enhancements like videos, animations, smooth transitions, and more. Get started with templates Choose from an array of high-quality pre-designed templates with different layouts, images, colors, and fonts.
A great PowerPoint presentation is: Prepared to Win. Research, plan, and prepare your presentation professionally. It helps you deliver an effective message to your target audience. Designed Correctly. Your visual points should stand out without overwhelming your audience. A good PowerPoint visual shouldn't complicate your message.
Get your main point into the presentation as early as possible (this avoids any risk of audience fatigue or attention span waning), then substantiate your point with facts, figures etc and then reiterate your point at the end in a 'Summary'. 2. Practice Makes Perfect. Also, don't forget to practice your presentation.
Design, present, inspire with Canva Presentations. Reimagine Presentations with cinematic visuals that captivate your audience - no matter how or where you're presenting. With features to collaborate smarter, create stunning data visualizations, and deliver confidently, Canva Presentations bring impact to your ideas. Create a presentation.
Financial PowerPoint Template with Calculator by SlideModel. 5. Use the Word "Imagine". "Imagine," "Picture This," and "Think of" are better word choices for when you plan to begin your presentation with a quick story. Our brain loves interacting with stories. In fact, a captivating story makes us more collaborative.
Google Slides is a cloud-based presentation software that will show up the same way on all operating systems. To import your PowerPoint presentation into Google Slides: Navigate to slides.google.com. Make sure you're signed in to a Google account (preferably your own). Under Start a new presentation, click the empty box with a plus sign. This ...
Use clear and legible fonts, and maintain a consistent design throughout the presentation. 2. Visual appeal: Incorporate visually appealing elements such as relevant images, charts, graphs, or diagrams. Use high-quality visuals that enhance understanding and make the content more engaging.
Professional designs for your presentations. SlidesCarnival templates have all the elements you need to effectively communicate your message and impress your audience. Captivate your audience with our collection of professionally-designed PowerPoint and Google Slides templates. Boost your presentations and make a lasting impression!
Add a slide with your organization's branding. On your computer, open a presentation in Google Slides. In the top left, click Templates . At right, click the template you want to use. Note: The Templates option appears only if your administrator makes organization-branded slides available. Update your presentation. Choose a theme and layout
Create a presentation. Open PowerPoint. In the left pane, select New. Select an option: To create a presentation from scratch, select Blank Presentation. To use a prepared design, select one of the templates. To see tips for using PowerPoint, select Take a Tour, and then select Create, . Add a slide.
Six steps for creating a slide show. 1. Plan your slide show. Before getting too deep into your slide show project, it's a good idea to select and save the photos and videos you want to use. This helps you create a slide show more efficiently and purposefully, ensuring a better outcome. 4.
Edit and Download. 10. Place shapes strategically. Don't underestimate the power of shapes in your presentation design. Or any design, really. Using various geometric shapes or even shapes you may not have heard of before to draw attention to various elements on the screen is a great design practice.
One person. Sharing and real-time collaboration. PowerPoint for the web and PowerPoint desktop app for offline use. Premium templates, fonts, icons, and stickers with thousands of options to choose from. Dictation, voice commands, and transcription. Advanced spelling and grammar, in-app learning tips, use in 20+ languages, and more.
Design a presentation that blows your audience away with our stunning collection of high-quality slide templates. Free to personalize online so you can collaborate and present with your colleagues. Birthday Presentations. Brainstorm. Father's Day Presentations. Simple. Pride Presentations. Education. Game.
A good presentation needs two fonts: a serif and sans-serif. Use one for the headlines and one for body text, lists, and the like. Keep it simple. Veranda, Helvetica, Arial, and even Times New Roman are safe choices. Stick with the classics and it's hard to botch this one too badly.
Free online presentation maker. Try our new tool to edit this selection of templates for people that want to let their creativity run free. Create interactive resources easily, quickly and without the need for any software. A really useful tool for teachers and students. Move the content, add images, change colors and fonts or, if you prefer ...
Download the Branded Content Minitheme presentation for PowerPoint or Google Slides and start impressing your audience with a creative and original design. Slidesgo templates like this one here offer the possibility to convey a concept, idea or topic in a clear, concise and visual way, by using different graphic resources.... Multi-purpose.
How to Create a Blank Presentation. Now that you have a Google account, it's time to create your first presentation. Head over to Google Slides and place the cursor on the multicolored "+" icon in the bottom-right corner. The + turns into a black pencil icon; click it. Pro Tip: Type.
How to Make a PowerPoint Presentation. Open the PowerPoint app, select a template and theme, then like "Create.". Click the text box to add your title and subtitle to create your title slide. Click the "Insert" tab, then "New Slide" to add another slide. Choose the type of slide you want to add, then add text and pictures.
Access Google Slides with a personal Google account or Google Workspace account (for business use).
A slide is a single screen of a presentation, and every presentation is composed of several slides. Depending on the subject matter, the best presentations may consist of 10 to 12 slides to get a message across, but more may be needed for complex subjects. Slides keep an audience's attention during a presentation and provide additional ...
A strong presentation is so much more than information pasted onto a series of slides with fancy backgrounds. Whether you're pitching an idea, reporting market research, or sharing something ...
To do that, simply go up to the Home tab and click on New Slide. This inserts a new slide in your presentation right after the one you were on. You can alternatively hit Ctrl+M on your keyboard to insert a new blank slide in PowerPoint. To learn more about this shortcut, see my guide on using Ctrl+M in PowerPoint.
When you're putting your own deck together, you'll certainly need to add slides and format them in different ways. In order to make a new slide appear in your presentation, first select the slide that you'd like your new slide to follow. Then click Home and choose New Slide. From there, you can choose your desired layout, and start ...
AI presentation maker. When lack of inspiration or time constraints are something you're worried about, it's a good idea to seek help. Slidesgo comes to the rescue with its latest functionality—the AI presentation maker! With a few clicks, you'll have wonderful slideshows that suit your own needs. And it's totally free!
Explore 2,350 free templates and graphics for captivating presentations, with new content added daily. Premium-Quality Designs. Effortless Customization. Absolutely Free. Enjoy 100% free downloads without registration or social sharing requirements - just a direct link. Wide collection of free PowerPoint templates and Google Slides themes ...
You can get PowerPoint templates that have modern designs, animated ones, or even hand-drawn art in each slide. The color schemes range from bold to subtle. Each template's slides are also organized based on what you may want to include in your presentation. You can use the template as a starting point and customize its specific details from theme.
Start by deciding whether to show the slideshow in a window or full screen. To set up the slideshow, select Slide Show > Set Up Slide Show and choose one of the following: Browsed by an individual (window): Run the slideshow automatically and inside a window. This option works best when you save the slideshow to a CD.
Linking Multiple Presentations: Create separate PowerPoint files for each slide size you need. In your main presentation, insert hyperlinks to the other presentations. This way, you can switch between different slide sizes seamlessly during your presentation. Embedding Slides as Objects: Create the slides with different sizes in separate ...
Training: Add animation and effects to text, pictures, shapes, and objects in your PowerPoint presentation. Watch this video to learn how. ... On Click - Start an animation when you click a slide. With Previous - Play an animation at the same time as the previous animation in your sequence.